


136
H4D
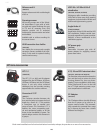
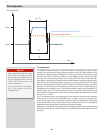
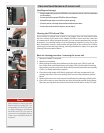
Cleaning using the HAMA cleaning uid and tissues
Note! Hasselblad recommends HAMA Optic Cleaning Fluid 5902.
1. Carefully spray the uid onto the IR lter at a distance of 10-15 cm (4-5 inches), so
that the uid is applied onto the lter as a thin, even haze. 1-2 sprays are enough. If
you apply too little, the uid will start to dry up before you start wiping the lter. As
an alternative you can spray the uid onto the tissue rst, and then apply it to the
lter as you wipe it.
2. Fold the tissue several times to match the width of the IR lter–you might use two
or three tissues at a time if necessary (to give you a better grip). Be sure to fold the
paper so that the coated glossy side faces outwards–do not use the other side, as it
can do more harm than good!
3. Gently place the folded tissue onto the edge of the lter using two or three ngers.
Be sure to wipe the entire surface evenly. Sweep the lter only once. Do not wipe the
same area twice with the same tissue as you might reapply dirt removed in the rst
sweep.
4. Finally check if the IR lter has been properly cleaned either by visual inspection or
by mounting the sensor unit to the camera and making a shot. If further cleaning is
needed, repeat cleaning procedure.
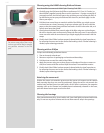
Cleaning with an E-Wipe
E-wipes are individually packed wet tissues.
1. Tear at the notch to break seal.
2. Remove e-wipe from its packaging and continue without delay.
3. Fold the tissue to match the width of the IR lter.
4. Apply rm pressure using two or three ngers at the edge of the wipe to ensure an
even, rm contact with lter surface. Wipe the surface in one unbroken motion.
5. Finally check if the IR lter has been properly cleaned either by visual inspection or
by mounting the sensor unit to the camera and making a shot. If further cleaning is
needed, repeat cleaning procedure.
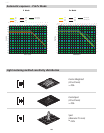
Attaching the sensor unit
Position the sensor unit retention groove onto the sensor unit support on the camera
body ensuring that they are correctly positioned. Swing the sensor unit towards the
camera body and rmly press into place with a click. If there is resistance, the magazine
retaining catch on the camera has probably been inadvertently released. In that case,
push the release button again to reset the catch.
Cleaning the housings
If the camera becomes dirty, clean it with a soft, clean cloth lightly moistened with water
only. Do not use any other solvents and do not allow water to seep in the openings.
Note
Do not use same side of the e-wipe
twice as you will be likely to re apply
any particles removed in the rst
pass.