


Logical Volumes
To configure or change volume settings:
1.
To select a volume, click the
Select a Volume
drop
-
down list.
2.
Click one of following options:
Note:
If an option is dimmed, that option is not available for the volume.
Option Description
Rename
Disk
This option opens a screen that lets you assign a new name to the selected
hard disk. Assigning your hard disks unique names can help you monitor your
system when you have more than one hard disk connected to your media
vault. (You cannot rename the SYSTEM disk.) For instructions on using the
Rename Disk screen, see
Rename a disk
.
Format Disk
This option opens a screen that lets you format a new internal hard disk or an
external USB hard drive. (You cannot format the SYSTEM disk.) For
instructions on using Format Disk screen, see
Format a disk
. Also see
Understanding file systems for formatting hard disks
.
Erase Disk
This option opens a screen that lets you erase all content and logical volumes
from a selected hard disk. (You cannot erase the SYSTEM disk.) For
instructions on using the Erase Disk screen, see
Erase a disk
.
Safely
Disconnect
Disk
Select this option to safely disconnect a USB disk. If you installed the HP
software from the Software Installation Disc, and you unplug a USB disk from
the media vault without safely disconnecting it, you will see a warning alert in
your computer
’
s system tray.
Option Description
Create
New
Volume
This option opens a screen that lets you create a new volume from available hard
disk space. For instructions on using the Create New Volume screen, see
Create
a new volume
.
Create a
Mirror
This option opens a screen that lets you create a mirror of a selected volume. For
instructions on using the Create a Mirror screen, see
Create a mirror
. Also see
Understanding disk mirrors and concatenated disks
.
Remove
Mirror
This option opens a dialog box from which you can remove a mirror. For
instructions on using the Remove a Mirror screen, see
Remove a mirror
.
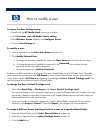
Modify
Volume
This option opens a screen that lets you change the name and/or size of the
selected volume. For instructions on using the Modify an Existing Volume screen,
see
Modify an Existing Volume
.
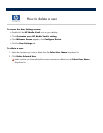
Delete
Volume
This option opens a screen that lets you delete the selected volume. For
instructions on using the Delete an Existing Volume screen, see
Delete an Existing
Volume
.
When you delete a volume all Shared Folders and all files on the
volume are permanently destroyed.