


70
10. TIME CODE OPERATION
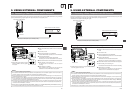
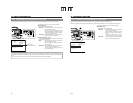
The GY-DV5100 also incorporates a time code reader. Therefore, when the unit enters record mode from record-standby mode, it
can read the time code data recorded on the tape and record time codes in continuation of the existing data. The recorded user’s
bit data are identical to the user’s bit data recorded on tape.
● However, approximately ±1-frame variations may occur in scene accuracy.
To enable this function, set the time code related switches as follows before starting recording.
OPEN
CH-1
AUDIO IN
AUDIO SELECT
CH-2
CH-1 CH-2
FRONT
REAR
AUTO
MANUAL
AUDIO
LEVEL
CH-1 CH-2
PULL
OPEN
LCDBRIGHT DISPLAY
COUNTER
CH-1
AUDIO IN
AUDIO SELECT
CH-2
CH-1 CH-2
FRONT
REAR
AUTO
MANUAL
TC GENE.
TC
MONITOR
SELECT
AUDIO
LEVEL
REAR
AUDIO IN
CH-1 CH-2
CH-1
MIX
CH-2
CH-1 CH-2
LINE
MIC
+48V
PRST
REGEN FREE
REC
UB
LCDBRIGHT DISPLAY
FRONT MIC +48V
OFF
ON
10-3
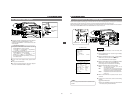
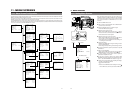
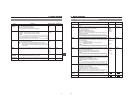
Recording Time Codes in Continuation of Time Codes Recorded on Tape
TC GENE switch
Setting
■Set the TC GENE switch inside the cover on the side to
REGEN.
● The time code framing mode automatically becomes the
mode (drop frame or non drop frame) already recorded on
the tape.
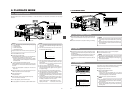
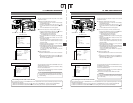
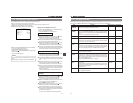
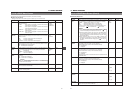
10-4 Reproducing Time Codes
The GY-DV5100 incorporates a time code reader. During playback, the time code or user’s bit data recorded on the tape is
displayed on the LCD monitor or in the viewfinder. (Status screen)
Status screen
Setting
☞ See “Displaying Time Code” on page 67.
CAUTION:
A time code with a duration of more than 2 hours may not
be displayed correctly by DV components for general
consumer use, as some of these lack the capability to
display longer time codes.
00:00:00:00
12
.2V
PLAY 01/02/03 01:23:45
Playback time code indication
10. TIME CODE OPERATION
E-70
The GY-DV5100 also incorporates a time code reader. Therefore, when the unit enters record mode from record-standby mode, it
can read the time code data recorded on the tape and record time codes in continuation of the existing data. The recorded user’s
bit data are identical to the user’s bit data recorded on tape.
● However, approximately ±1-frame variations may occur in scene accuracy.
To enable this function, set the time code related switches as follows before starting recording.
OPEN
CH-1
AUDIO IN
AUDIO SELECT
CH-2
CH-1 CH-2
FRONT
REAR
AUTO
MANUAL
AUDIO
LEVEL
CH-1 CH-2
PULL
OPEN
LCDBRIGHT DISPLAY
COUNTER
CH-1
AUDIO IN
AUDIO SELECT
CH-2
CH-1 CH-2
FRONT
REAR
AUTO
MANUAL
TC GENE.
TC
MONITOR
SELECT
AUDIO
LEVEL
REAR
AUDIO I N
CH-1 CH-2
CH-1
MIX
CH-2
CH-1 CH-2
LINE
MIC
+48V
PRST
REGEN FREE
REC
UB
LCDBRIGHT DISPLAY
FRONT MIC +48V
OFF
ON
10-3
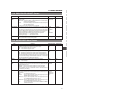
Recording Time Codes in Continuation of Time Codes Recorded on Tape
TC GENE switch
Setting
■Set the TC GENE switch inside the cover on the side to
REGEN.
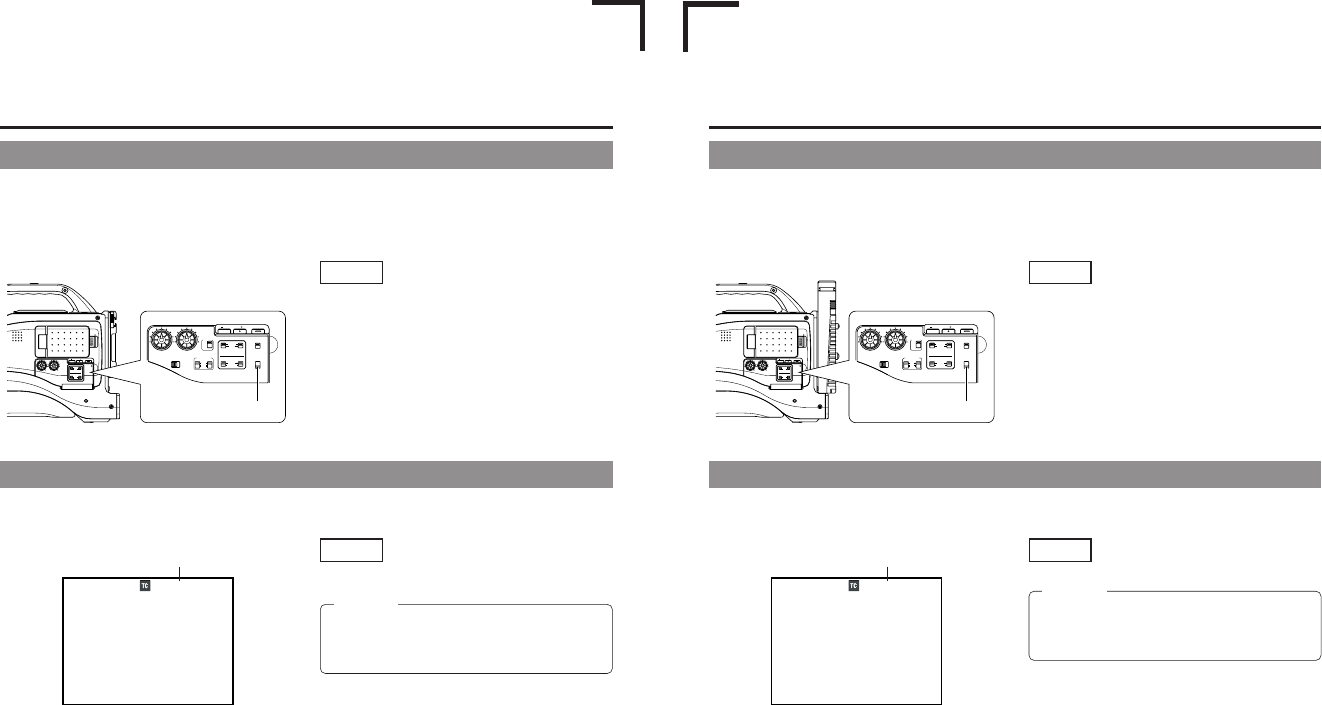
10-4 Reproducing Time Codes
The GY-DV5100 incorporates a time code reader. During playback, the time code or user’s bit data recorded on the tape is
displayed on the LCD monitor or in the viewfinder. (Status screen)
Status screen
Setting
☞ See “Displaying Time Code” on page 67.
CAUTION:
A time code with a duration of more than 2 hours may not
be displayed correctly by DV components for general
consumer use, as some of these lack the capability to
display longer time codes.
00:00:00:00
12
.2V
PLAY 01/02/03 01:23:45
Playback time code indication
E
U