


92
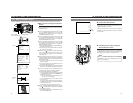
12. FEATURES OF THE CAMERA SECTION
This switch allows the gain to be boosted when the illumination
of the subject is insufficient.
The gain should be switched when the brightness is insufficient due to poor lighting conditions.
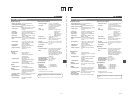
GAIN SWITCHING
When the GAIN switch is switched, the newly set gain is
displayed for about 3 seconds on the Status (0, 1, 3) screen in
the viewfinder or LCD monitor.
Set it to L (0 dB) in normal use.
■The gain set for each of the switch positions can be changed
with “GAIN” on the CAMERA OPERATION menu screen.
It is also possible to use the ALC function that varies the gain
automatically.
A setting at –3dB corresponds to a decreased sensitivity
equivalent to the brightness of a 1/2 filter.
☞ See page 75 for details.
■The gain transition can be made smoother by selecting
“SMOOTH TRANS” on the CAMERA OPERATION menu
screen.
☞ See page 75.
However, note that the SMOOTH TRANS function is not
available if gain is set to ALC.
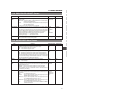
Switch Position Factory-Set Gain
L 0dB
M 9dB
H 18dB
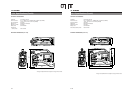
The LOLUX button is used when the illumination is still
insufficient after compensating with the GAIN switch.
Pressing the LOLUX button again will enter the LOLUX mode.
The gain up value during the LOLUX mode is set in LOLUX
GAIN of the CAMERA OPERATION menu.
“LOLUX ON” is displayed for about 3 seconds on the Status (0,
1, 3) mode screen in the viewfinder or LCD monitor.
Pressing the button again cancels the LOLUX mode.
“LOLUX OFF” is displayed for about 3 seconds.
■When the LOLUX function is in use, the image definition on
the screen will degrade to increase residual images, but this
is not a malfunction.
GAIN BOOST UNDER LOLUX CONDITION
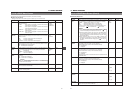
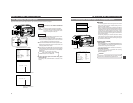
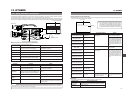
Relationship between gain, iris and shutter
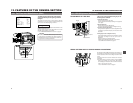
12-5 Gain (Sensitivity) Adjustment
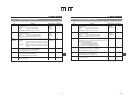
GAIN switch
LOLUX on/off button
When gain is set to “ALC”, gain is boosted automatically
as the illumination becomes darker. However, noise will
increase a little because the screen becomes brighter as
the ALC (Auto Level Control) function boosts the gain more
than in the case of manual adjustment.
CAUTION:
AUTO IRIS
BACK L
NORMAL
SPOT L
STRETCH
NORMAL
COMPRESS
FULL AUTO BLACK LOLUX
MODE
POWER
ON OFF
VTR
VTR
CAM
AUTO IRIS
BACK L
NORMAL
SPOT L
STRETCH
NORMAL
COMPRESS
FULL AUTO BLACK LOLUX
MODE
POWER
ON OFF
VTR
VTR
CAM
F1.4 F11 F16
LOLUX
FULL AUTO SHOOTING
ALC AUTOMATIC IRIS EEI
36 dB 12dB 0 dB 1/60 1/240
0.2 Lx 32 Lx8 Lx 2000 Lx 4200 Lx 18000 Lx
93
12. FEATURES OF THE CAMERA SECTION
AUTO IRIS
BACK L
NORMAL
SPOT L
STRETCH
NORMAL
COMPRESS
FULL AUTO BLACK LOLUX
MODE
POWER
ON OFF
VTR
VTR
CAM
AUTO IRIS
BACK L
NORMAL
SPOT L
STRETCH
NORMAL
COMPRESS
FULL AUTO BLACK LOLUX
MODE
POWER
ON OFF
VTR
VTR
CAM
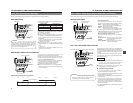
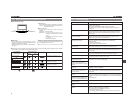
12-6 Switch Setup According to Illumination and Subject
Various switch settings are performed to accommodate the conditions of the illumination and the subject when shooting.
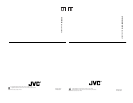
SWITCH FUNCTIONS
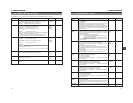
1AUTO IRIS LEVEL switch
This switch allows the reference value for the auto iris
adjustment to be changed according to the lighting condition.
BACK L : When the subject is in backlit conditions.
Opens the iris wider than the standard setting.
NORMAL: Normal lighting condition.
SPOT L : When the subject is under a spotlight.
Closes the iris narrower than the standard setting.
■The level of auto iris can be set in SPOT L/BACK L on the
CAMERA OPERATION menu screen when the AUTO IRIS
switch is set to BACK L or SPOT L. ☞ See page 75.
2BLACK stretch/black compress switch
This switch makes the image easier to see by varying the
black gain.
BLACK STRETCH : Boosts the gain of black areas to
improve the reproducibility of black.
NORMAL : Normal black gain.
BLACK COMPRESS
: Attenuates the gain of black areas to
make the image sharper.
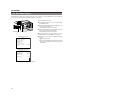
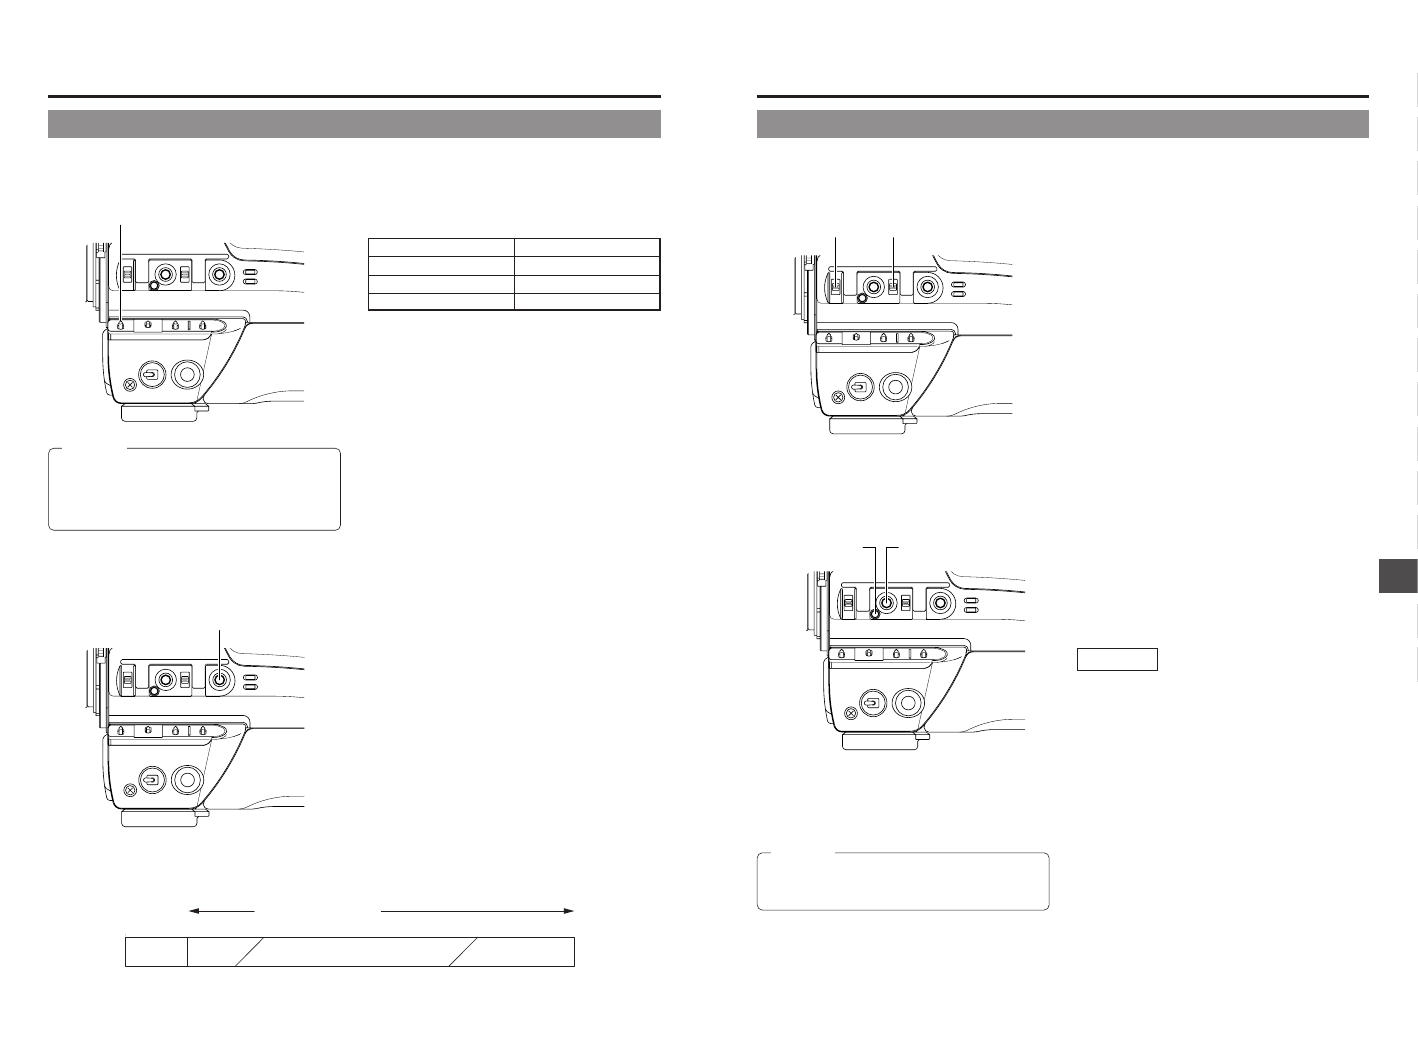
The FAS function provides a wide range of compatibility with
shooting conditions that varies as you move between indoors
and outdoors or between bright and dark locations. It eliminates
the need to change the switch and filter positions every time
you move.
The FAS function provides an integrated control of the ALC
(Automatic Level Control), Auto iris and FAW (Full-time Auto
White balance) functions.
1.
Simply press the FULL AUTO button to enter the FAS mode,
in which the FULL AUTO indicator lights and “FAS” is
displayed to the right in the viewfinder or LCD monitor.
2.
Pressing the FULL AUTO button again cancels the FAS
mode and turns the FULL AUTO indicator off.
■ Automatic Setting Contents
● If you have been displaying the color bars, the screen is
switched automatically to the camera image.
● The auto iris adjustment mode is entered even if the iris mode
switch of the lens is set to manual.
● The GAIN switch and WHT.BAL switch settings are defeated
in the FAS mode.
● The LOLUX button setting is active even in the FAS mode.
However, the ALC and EEI are defeated in the LOLUX mode,
in which only the auto iris adjustment and FAW are used.
● All of the previous setting contents are recalled when the
FAS mode is cancelled.
● The SMOOTH TRANS function is defeated during switch to
the FAS function.
Operation
FULL AUTO SHOOTING (FAS) FUNCTION
● When the power is turned on while the camera is in the
FAS mode, it takes about 10 seconds before the
automatic adjustment of FAS is completed.
CAUTION:
AUTO IRIS
LEVEL switch
BLACK stretch/black
compress switch
FULL AUTO indicator
FULL AUTO/shooting button