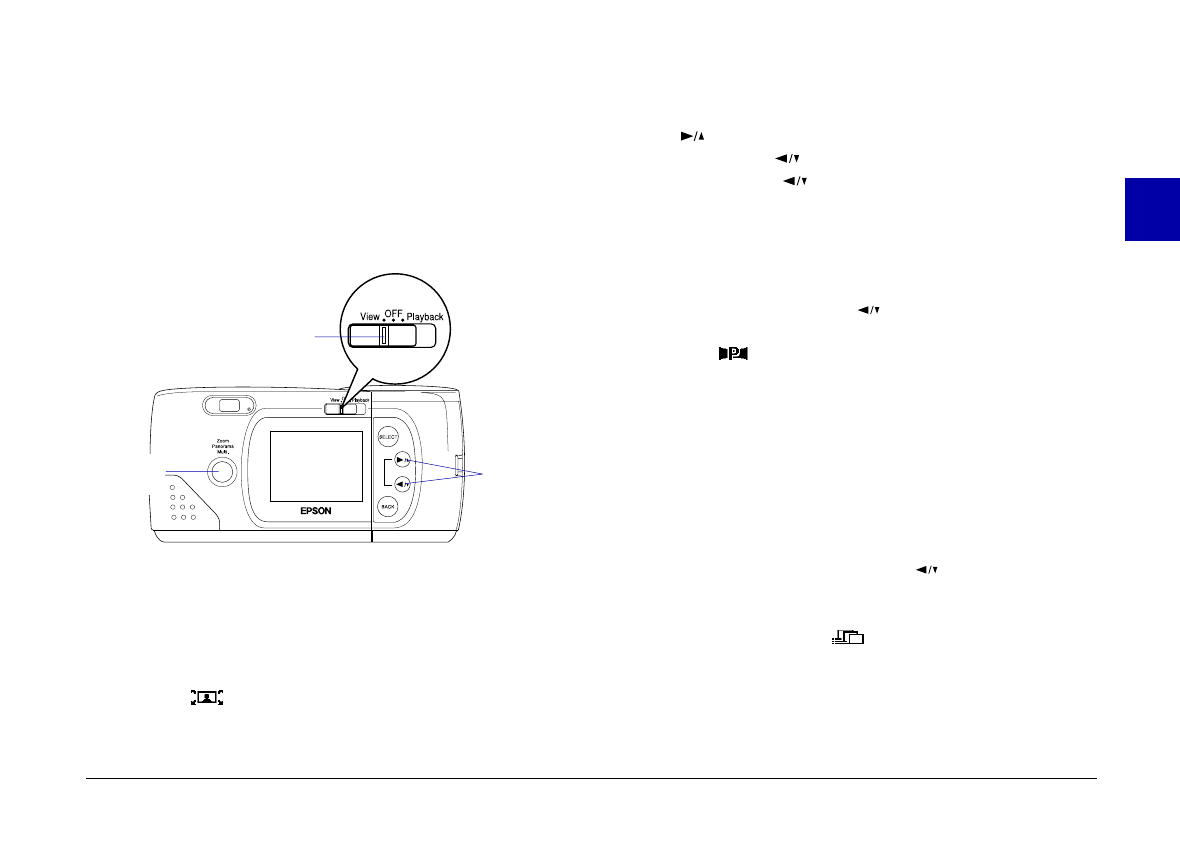
To use these special photo formats, follow these steps:
1. Turn the camera on and slide the monitor mode switch
to View. A live preview appears on the LCD screen.
2. Use the photo format button and navigation buttons
surrounding the LCD monitor to control the photo
format modes, as described below.
Zoom
To select the zoom mode, press the photo format
button. An orange frame appears around the
previewed image, and ZOOM is displayed briefly on
the screen along with the zoom power and a zoom
icon .
You can increase the zoom rate from 1 (normal) to 1.3,
1.6, 2, 2.5, or 3 times normal by pressing the
button. To decrease the rate from 3 back down to
1, press the button. (If the zoom rate is already 1,
pressing the button switches the photo format
mode to panorama.) In zoom mode, images are
captured at standard image quality (640 x 480 pixels).
Panorama
To select the panorama mode, press the photo format
button, then press the button once. PANORAMA
appears briefly on the screen along with a panorama
icon and the LCD screen is framed with black
margins at the top and bottom.
While in panorama mode, you can use the image quality
control button on top of the camera to select fine or
super fine image quality (1024 x 384 pixels). See page
28 for more information on image quality settings.
Multi-frame
To select the multi-frame mode, press the photo
format button, then press the button twice. A
red frame appears around the previewed image, and
MULTI is displayed briefly on the screen along with
a multi-frame icon . Images are captured at
standard image quality (640 x 480 pixels).
monitor mode switch
navigation buttons
photo format
button
2
R
Poppy Rev.B/TCAT
A5 size Chapter 2
97/09/18 pass 6
Taking Pictures with PhotoPC 600
31
