


5. If there is more than one HP Scanjet N6350 scanner on the network, locate the serial
number and IP address of the scanner to which you want to connect.
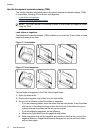
a.
Press the Setup (
) button on the scanner control panel, use to select
Network, and then press OK.
b.Use
to select View Settings, and then press OK.
c.Use
to scroll to the serial number and IP address settings, then press OK to
view the information without scrolling.
6. Complete the network connection.
If you have already installed the HP scanning software, complete these steps:
a. Start the HP Scanner Tools Utility.
b. Click the Network tab, click Connect Scanner, and then follow the onscreen
instructions.
If you have not installed the HP scanning software, insert the scanning software CD
into the CD drive and complete the network connection.
a. When you see the Found Network Scanner dialog box, select the scanner you
are installing, and then click Next.
b. On the Computer Name dialog box, enter the computer name to be listed on the
scanner control panel, and then click Next.
c.On the Adding Device dialog box, click Next when the status bar indicates that
the new device has been added.
NOTE: This scanner supports a maximum of 20 network users. If there are
already 20 network users, you will see a Computer List Full dialog box. If
you have scanner administrator privileges, you can remove a computer from
the list and continue with the network installation.
See also
“
Change the scanner name” on page 20
Change the scanner name
To change the scanner name later, complete these steps:
1. In Windows Explorer, click My Computer, click Control Panel, and then click
Scanners and Cameras.
2. Right-click the network scanner you want to rename, and then select Rename.
3. Enter a new name for the network scanner.
NOTE: This name change is reflected in your scan application and in the
HP Scanner Tools Utility on this computer only. The change is not reflected on all
computers which have access to this network scanner.
Chapter 2
20 Configure and manage the scanner on a network