


b. Select the Content Root page title to select the Content Root page.
c. At the Content Root page, click New Label.
d. Create a label called My Favorites.
e. Assign privileged user access to all authenticated users.
f. Click OK when you have finished.
g. Click Portal Settings -> Custom Unique Names.
h. Assign wps.My Favorites as a unique name to the My Favorites label you just created.
i. Click OK when you have finished.
j. Click Administration -> Portal User Interface -> Manage Pages.
k. Add a page parameter key of Favorites with a value of Yes.
l. Add <portal-logic:if/> tags with the pageBookmarkable attribute set to true to pages
that you want to be able to bookmark.
Enable Dynamic Theme Reloading
Since you are changing the portal themes and skins, it is helpful to have these changes enabled without
restarting the portal. To do this, follow these steps:
1. Stop the Portal Server.
2. Locate and edit the following file:
<WAS_root>\config\cells\<node_name>\applications\wps.ear\deployments\wp
s\wps.war\WEB-INF\ibm-web-ext.xmi
3. Search the file for the parameter named reloadingEnabled and change the setting from false
to true.
Note: The file also contains a parameter with a similar name, reloadEnable, which is already
set to true. Ensure that you change the reloadingEnabled parameter, which is located in the
header portion of the file.
4. Save the file and restart the Portal Server.
Note: There is a significant performance impact when running the server with the
reloadingEnabled parameter set to true. Only change this setting while developing a new
theme or skin. When you are finished developing the theme or skin, change the setting back to
false, and then stop and restart the server.
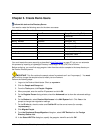
Create New Skins
Perform this task on the Development Client.
Defining your own skins involves creating a subdirectory using the skin name in the following directory:
<was_profile_root>/installedApps/cellname/wps.ear/wps.war/skins/<markup_type>
/
You must also create the supporting resources within that directory. The following steps describe one way
to create your own HTML-based skin using an existing skin.
1. Create a new directory using the new skin name; for example:
56 Collaborative Portal: Implementation Guide