35
Enhancing Images
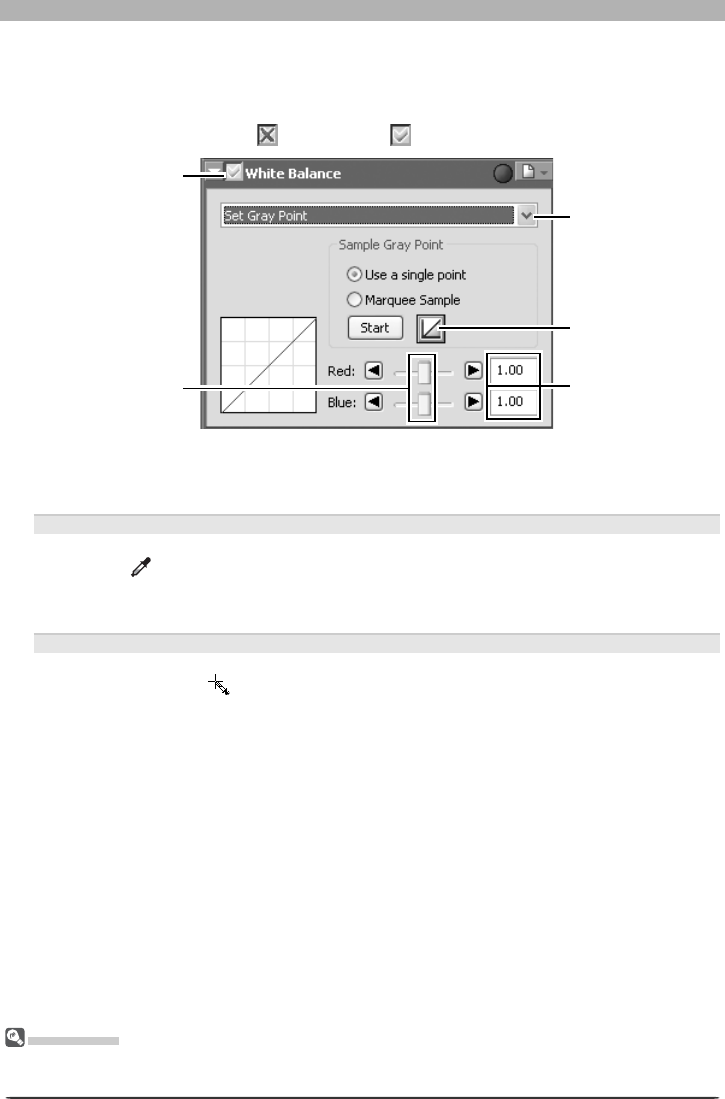
Gain values
Reset button
Pop-up menu
Sliders
Sampling the Image for Gray Point
1
Select Set Gray Point
Select Set Gray Point from the pop-up menu at the top of the White Balance palette.
2
If the Apply button is off ( ) , turn it on ( )
Sample Size
The size of the area sampled with the eyedropper cursor can be set using the Dropper sample size
option in the Advanced Color tab of the Pref er enc es dialog.
3
Sample the image to choose a reference point for white balance
White balance can be defi ned using a single pixel or the average of the values for all pixels
in a selected area.
Using a Single Point to Defi ne White Balance
After selecting Use a single point, click Start. The cursor will take the shape of an
eyedropper (
) when moved over the image in the active window. Click a point that you
would like to appear a neutral gray color in the fi nal image. The new value for white bal-
ance will be refl ected in the image in the active window.
Using the Average of the Area Sampled to Defi ne White Balance
After selecting Marquee Sample, click Start. The cursor will take the shape of an area-
selection eyedropper (
) when moved over the image in the active window; drag the
mouse over the image to select an area. White balance will be set to the average for the
selected areas, and the image in the active window will be updated to refl ect the new
value for white balance.
Apply button
