39
Enhancing Images
2
If the Apply button is off ( ) , turn it on ( )
3
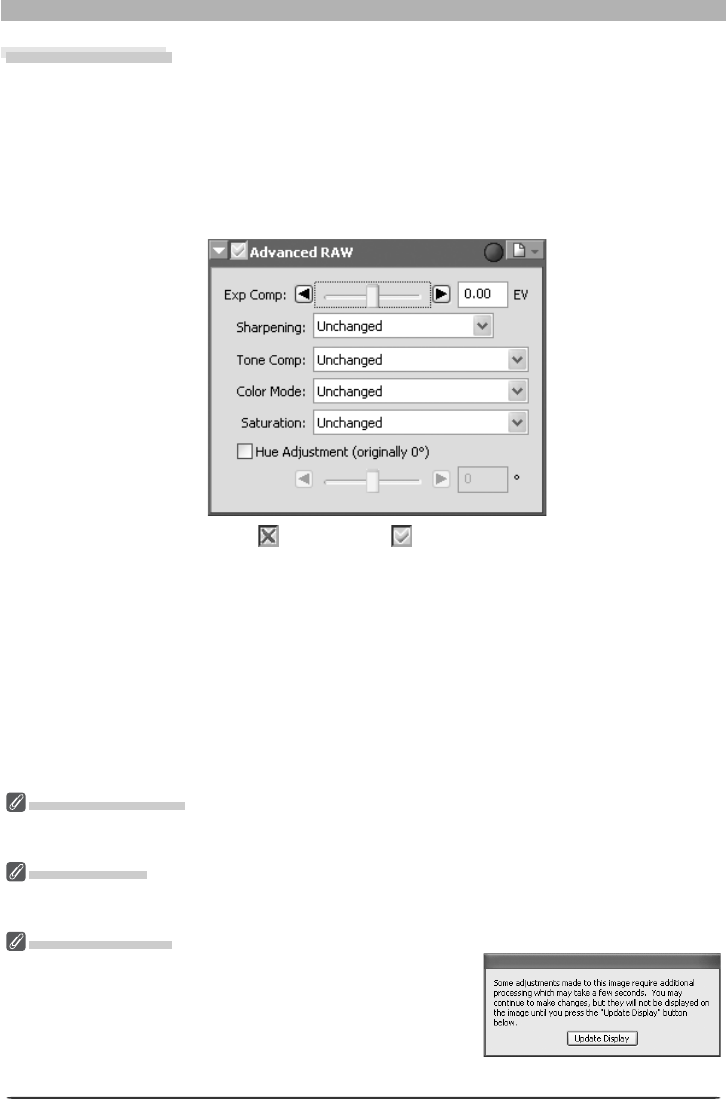
Adjust Advanced RAW settings
Exp Comp: Choose a value from –2 to +2 EV using the slider or enter a value in the text
box to its right. Choose 0 to perform no compensation.
Sharpening: Adjust the sharpness of outlines in the image according to the scene or your per-
sonal preference. Choose from Unchanged, None, Low, Medium Low, Normal, Medium
High or High. In the case of photographs taken with D1, Normal is equivalent to None.
Advanced RAW
The options in the Advanced RAW palette are used to alter exposure compensation, image
sharpening, tone compensation, color mode, and hue ad just ment from the settings in effect
at the time the pho to graph was taken.
1
Display the Advanced RAW palette
Select the tool palette containing the Advanced RAW palette from the View menu (the
default location for the Advanced RAW palette is Tool Palette 2) and click the triangle at
the top left corner of the palette.
The Warning Button
A warning button appears if the image in the active window is displayed at a zoom ratio too low to allow
the effects of Advanced Raw settings to be displayed. Click the button to view the warning.
Advanced RAW
Advanced RAW can be performed on RAW images only. If the image in the active window is JPEG or
TIFF, the Apply button in the Advanced Raw palette will be grayed out and inactive.
COOLPIX Cameras
Tone Comp > User-Defi ned Custom Curve and the Medium
Low and Medium High options for Sharpening and Tone Comp
are not available in the case of RAW images taken with COOLPIX-
series cameras. A dialog like that shown at right may be displayed
after adjustments to exposure compensation, sharpening, and tone
compensation. Click Update Display to view the effects of the
new settings.
COOLPIX 8800
