93
Enhancing Images
This section describes how to use batch processing with fi les that have already been saved
to the computer’s hard disk. For in for ma tion on batch processing of images captured directly
from the cam era, see “Nikon Capture 4 Camera Control” (
116).
1
Display the Batch dialog
Click the
button or select Batch from the Tools menu to display the Batch dialog.
2
Choose a source folder
In the Source section, choose the folder containing the images to be processed. The cur-
rent folder is listed in the text box. To choose a new folder, click the Browse... button and
navigate to the desired location.
Include subfolders: Check this option to process all images in any sub-folders under the
specifi ed fold er. Folders with the same names will be created in the destination folder.
Periodically check for new fi les in this folder: When this option is checked, Nikon
Capture 4 will check for new images in the specifi ed folder once every ten seconds. This
option is not available when Include subfolders is checked or when Use save progress
window is selected in the Performance tab of the Preferences dialog.
Delete fi les from this folder after they are processed: Check this option to delete image
fi les from the selected folder after processing. A warning dialog will be displayed before
batch processing begins. This option is not available when Use source fi le name is se-
lected in the Destination section or when Use Save Progress Window is selected in the
Performance tab of the Preferences dialog.
Selecting Folders for Batch Processing
For improved effi ciency, create two folders that are used only for batch processing, one for the originals
and the other for processed images.
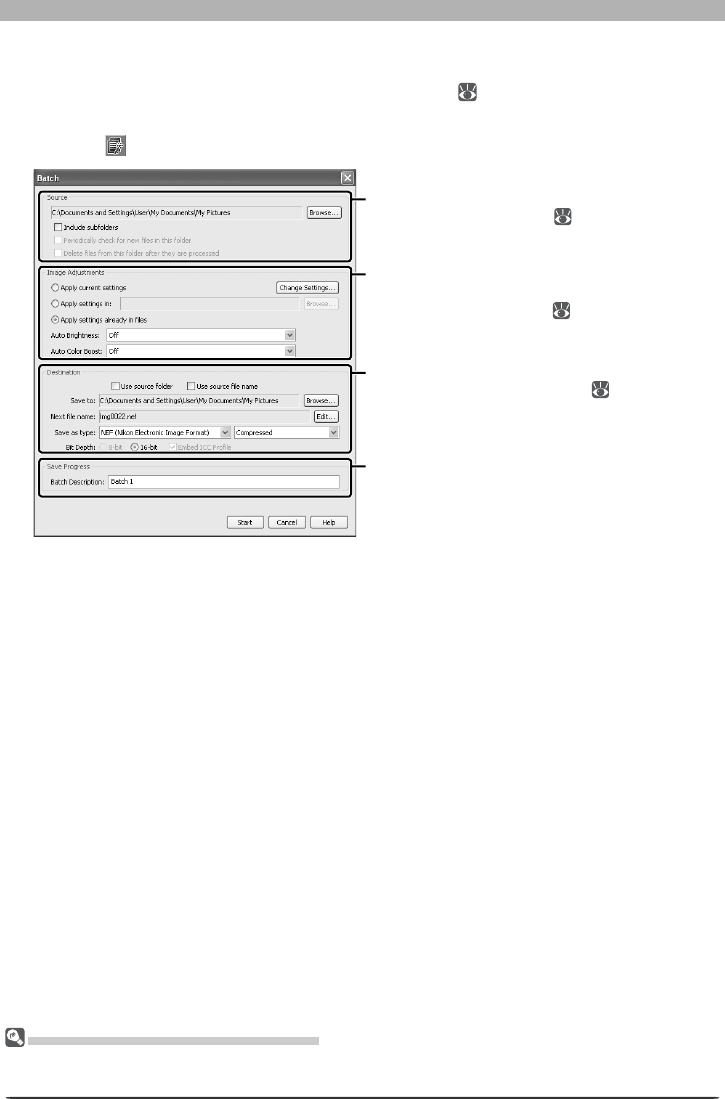
Source section
Choose a source folder (
93).
Image Adjustments section
Choose the operations that will be per-
formed on each image (
94).
Destination section
Choose a destination folder (
95).
Save Progress section
Choose a name for the batch process dis-
played in the Save Progress window.
