


11
Making image adjustments for the selected remote camera (continued)
Setting an ND filter
The ND filter setting can be configured when the selected remote
camera uses a lens with an ND filter function.
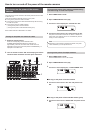
1.
Press the MENU button to turn on its indicator.
2.
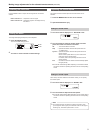
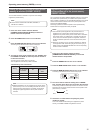
Open ND FILTER menu [22].
1.ND FILTER
ND1
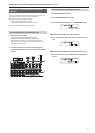
3.
Turn the F2 dial to select a setting, and then press the
F2 dial to confirm the selection.
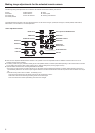
The settings displayed when you turn the F2 dial differ depending on
the model of remote camera connected.
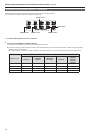
The following shows the menu display on the unit and the setting
values of the remote cameras.
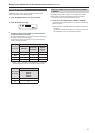
Menu display
on the unit
Remote camera setting values
AW‑HE120
AK‑HC1500
AK‑HC1800
AW‑HE50
AW‑HE60
AW‑HE100
(*1)
ND1 Through Clear ―
ND2 1/4 1/4 ―
ND3 1/16 1/16 ―
ND4 1/64 1/64 ―
(*1) “ND2↓”, “ND3↓”, and “ND4↓” can be displayed by turning the F2
dial but a selection cannot be confirmed by pressing the dial.
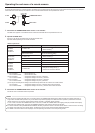
Menu display
on the unit
Remote camera setting values
AW‑HE870
AW‑E860
AW‑E750
AW‑E650
AW‑E350
Off Off
On On
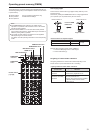
Selecting an ND filter with the USER buttons (USER 1
to USER 8)
The ND filter settings “ND1” to “ND4” can be assigned to the USER
buttons (USER 1 to USER 8) to enable selection with the buttons.
⇒ “Assigning functions to the USER buttons” (page 30)
1.
Press one of the USER buttons (USER 1 to USER 8).
The indicator of the selected button turns on and the corresponding
ND filter is applied.
zWhen AW-HE870, AW-E860, AW-E750, AW-E650, or AW-E350 is
connected:
The ND filter of the remote camera can be turned Off and On with
the USER button on the unit that has ND1 assigned.