Reformatting a disk
When a disk is used for the first time, “REFORMAT?” appears (see page 156) and you
automatically start the formatting process. However, depending on the condition of the disk, this
message may not appear. To format the disk in such a case, follow the procedure given below.
Also, even for disks that have been formatted with the digital disk camera before, data may
become corrupt or the disk may become reformatted by a computer making the disk unusable
with the digital disk camera. If this happens, formatting the disk with the digital disk camera may
make the disk usable again.
There are two types of formatting available with your digital disk camera.
Quick format: For quickly erasing all the data on the disk.
Full format: Before capturing important images, to ensure that images are captured properly,
it is recommended to perform a full format beforehand.
Important
Be aware that if the disk is reformatted, all the data currently stored on the disk, even protect data
(see page 152), will be erased.
Preparation
œ Insert a disk with its write-protect tab set to the write-enabled position (see page 155).
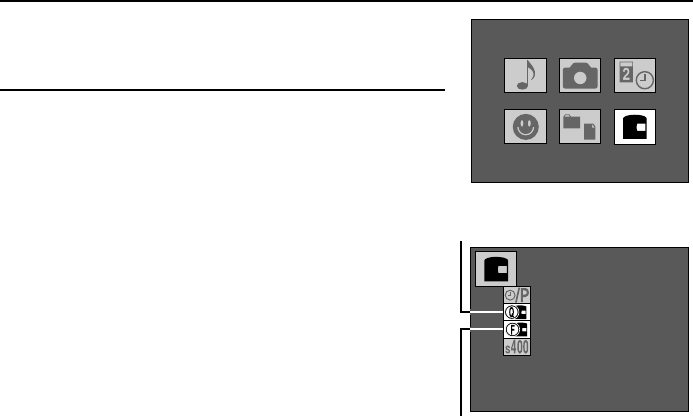
œ Turn the mode selector dial to ê to display the Option Screen.
1
Press the arrow button to select the disk icon â and
press the SET button.
œ The Disk Tools Screen appears.
2
Press l on the arrow button to select the quick
format icon t or the full format icon u.
œ When selecting the full format, be sure to connect the
digital disk camera to an AC power outlet with the
supplied AC adapter/charger. The full format takes
approximately 20 minutes. If the AC adapter/charger is
not connected, “AC ADAPTER REQUIRED” appears
flashing and the format cannot be performed.
For the quick format: Select t
For the full format: Select u
Option Screen
OPTIONAL
FUNCTIONS
DISK TOOLS
QUICKFORMAT
Quick format icon
Full format icon
Disk Tools Screen
157
English


