


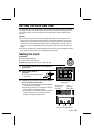

SETTING THE DATE AND TIME
Your digital disk camera is equipped with a clock function that will record the date and time that
any image, video clip, or audio recording is made so that it can be displayed during playback. An
internal battery backs up the clock setting so that it is retained even when the battery pack is
removed.
Caution
œ Even if the battery pack is removed and the digital disk camera is not connected to an AC
power supply, the clock setting will be retained by an internal backup battery (see page 23).
However, if this is continued for a long period of time, this battery will lose its charge and the
clock and other camera settings will return to their initial settings (00:00, January 1, 2001). If
you have not used your digital disk camera for a long time, make sure to first check the clock
setting.
œ When the clock setting is in its initial setting, the timer mark (#) in the mode display panel will
flash. When the clock is set, the mark will disappear (see page 33).
Setting the clock
Preparation
œ Insert a disk (see page 30).
œ Turn the power on (see page 32).
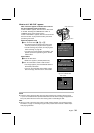
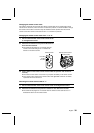
Example: Setting the clock to 7:30 p.m., August 28, 2001.
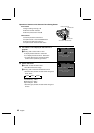
1
Turn the mode selector dial to (ê) to display the
option screen.
2
Set the monitor switch to
“MONITOR.”
œ The Option Screen appears in the
LCD monitor.
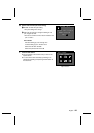
3
Press the arrow to select the date and time setting
icon á and press the SET button.
œ The Date and Time Setting Screen appears with the
current date and time settings.
œ The setting of whether or not to display the date and
time at playback is displayed in orange.
œ To set whether or not to display the date and time at
playback, the date format, or the date and time,
proceed to the operations given below.
OPTIONAL
FUNCTIONS
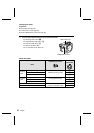
Date and time setting icon
Option Screen
CLOCK SET
DISP ON Y/M/D
2001/01/01
00 00
Display of date and
time at playback
on/off setting
Format of
display of date
and time setting
Year
Hour
Minute
Month Day
Date and Time Setting Screen
English
42