


1-36
DXC-D35/D35WS(UC)
DXC-D35P/D35WSP(CE) V1
70
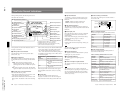
Chapter 4 Viewfinder Screen Indications and Menus
Chapter 4 Viewfinder Screen Indications and Menus
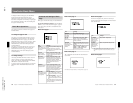
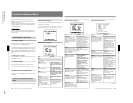
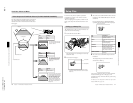
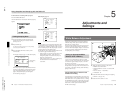
Video Output and Viewfinder Picture (For DXC-D35WSL/D35WSPL)
Subject
2
/
3
-inch optics
4:3 effective area
16:9 effective area
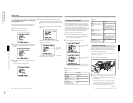
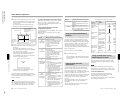
Item Settings
16:9/4:3 16:9
VF SCAN AUTO
The camera outputs 16:9 video.
The scan size of the viewfinder
picture is 16:9 size.
Viewfinder picture
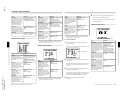
Item Settings
16:9/4:3 16:9
VF SCAN FULL
The camera outputs 16:9 video.
The viewfinder picture is 16:9
video that has been stretched
vertically to completely fill the
display area.
Viewfinder picture
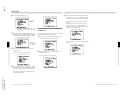
Item Settings
16:9/4:3 4:3
VF SCAN AUTO or FULL
The camera outputs 4:3 video that
has been electronically extracted
from the effective area of the 16:9
aspect ratio. Compared to 16:9
video, this video appears as if a
zoom lens has been adjusted
slightly toward the telephoto end.
The picture in the viewfinder is 4:3
video, which completely fills the
display area.
Viewfinder picture
Viewfinder Advanced Menu
The video output and viewfinder picture of this camera
vary as shown below according to the settings of the
16:9/4:3 item and the VF SCAN item of the advanced
menu page 9.
Chapter 4 Viewfinder Screen Indications and Menus
71
Chapter 4 Viewfinder Screen Indications and Menus
Setup Files
You can use setup files to reproduce a particular
configuration of settings. You can also revise the
contents of setup files.
There are eight types of setup files, of which five are
factory preset setup files and the other three are user
files.
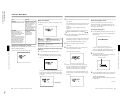
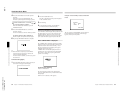
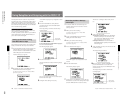
Calling up a Setup File
This describes how to call up a setup file and use it to
replace the current menu settings.
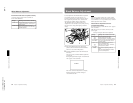
1
Set the SET UP switch to FILE.
The camera head is set according to the currently-
selected file data.
2
Access basic menu page 3.
a)An asterisk (*) appears in front of any factory
preset file whose contents have been revised at
least once.
SET UP switch
Current file
a)
Selected file
3
Move the cursor to SELECT FILE and use the UP/
ON button or the DOWN/OFF button to select the
desired file.
Press the UP/ON button or DOWN/OFF button
repeatedly until the desired file name is displayed.
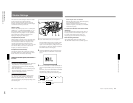
4
Move the cursor to CHG FILE and press the UP/
ON button.
The display changes as shown below and the
selected file is called up.
You can also call up these files via a similar operation
in advanced menu page 10. In this page, a file
recorded onto a tape can also be called up (when using
the DSR-1/1P).
For details, see “To call up files recorded onto a tape (when
using the DSR-1/1P)” (page 72).
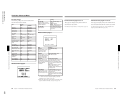
USER1 to USER3 User setup files (set to STD at
shipping)
File
Description
STD
Settings for shooting under
standard conditions
HI SAT Settings for making pictures
vivid
FL Settings for shooting under
fluorescent lighting
FILMLIKE Settings for making pictures like
ones shot by film camera
Settings to optimize camera
image for recording and
playback characteristics of S-
VHS, VHS, or Hi-8 tape
SVHS/VHS