


1-40
DXC-D35/D35WS(UC)
DXC-D35P/D35WSP(CE) V1
78
Chapter 4 Viewfinder Screen Indications and Menus
Chapter 4 Viewfinder Screen Indications and Menus
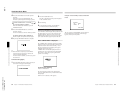
To abort the data recording while in progress
Press the DOWN/OFF button.
After the data has been recorded, the following display
appears.
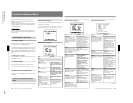
Viewing SetupLog Data
1
Connect the DSR-1/1P and load the tape that
contains the recording to be viewed. Turn the
camera power on.
2
Play back the tape.
For details of playback operation, see the operating
instructions for the DSR-1/1P.
3
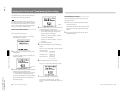
Press the MENU/STATUS switch up to the
STATUS side.
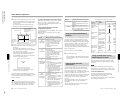
The display changes to page 1 of the status display.
PLAY
TCR 12:34:56:00
SETUP LOG 1/3
W:A
WHITE : A 3200
A.IRIS : STD
FILE : STD
F5.6
DCC+ : ON
0dB
SKIN DTL : OFF
3200
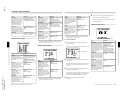
Each time you press upward the MENU/STATUS
switch, the status display cycles through the status
pages and playback display in the order: page 2,
page 3, the playback display (containing the
current settings), and page 1.
Status display (page 2)
PLAY
TCR 12:34:56:00
SETUP LOG 2/3
W:A
A.IRIS : ± 0
DTL LEV : ± 0
M.BLACK : ± 0
F5.6
STRETCH : ± 0
0dB
SS :1/100
3200
Status display (page 3)
PLAY
TCR 12:34:56:00
SETUP LOG 3/3
W:A
M.GAMMA : ± 0
V DTL LEV: ± 0
DTL FREQ : M
F5.6
SKIN SAT : ± 0
0dB
SKIN HUE : ± 0
3200
SAT : ± 0
HUE : ± 0
Notes
•SetupLog data is not recorded while SetupNavi data
or a setup file is being recorded onto a tape. (If you
play back a tape containing SetupNavi data or a setup
file, the data displayed in the setup display is not the
SetupLog data of the playback picture.)
•In the following cases, changed settings that were not
recorded may appear as blank settings.
– SetupLog data is overwritten at intervals of a few
seconds during recording. If the settings are
changed frequently for certain items, it may not
always be recorded in time.
– If the recording time is very short, recording may
be ended before all of the data has been
overwritten.
Settings during
recording
Using SetupNavi and SetupLog with the DSR-1/1P
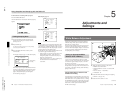
Chapter 5 Adjustments and Settings
79
Chapter
5
Adjustments and
Settings
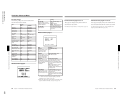
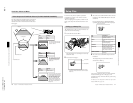
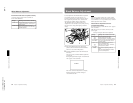
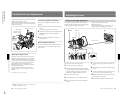
1
Make the following settings on the camera.
•POWER switch: ON SAVE
•OUTPUT/DL/DCC+ switch: one of the CAM
positions
•Lens iris selector: A (automatic)
•ATW button: off
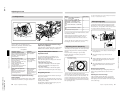
2
Set the FILTER control according to the lighting
conditions. (See page 43.)
3
Set the W. BAL switch to A or B.
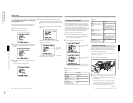
Adjusting the white balance ensures that as lighting
conditions change white objects remain white in the
image and tones remain natural.
The color of light emitted varies from one light source
to another, and as the lighting changes the apparent
color of an illuminated subject changes. It is therefore
necessary to adjust the white balance each time the
principal lighting source changes.
Saving an Appropriate White
Balance Value in Memory
You can save two white balance values in separate
memories, A and B. Unless changed, the saved values
are retained for approximately ten years, even when
the camera is powered off.
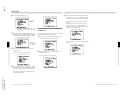
Once a value is saved, you can automatically restore
the adjustment by moving the W. BAL switch to the A
or B position. This makes shooting under alternating
lighting conditions easy.
Separate white balance values for each
FILTER control setting
In the default case, as described above, the same two A
and B white balance values apply to all four settings of
the FILTER control. It is possible, however, to change
the AWB MEM menu setting is advanced menu page 3
(see page 65) so that there are eight possibly different
values for the A and B positions and for the four
FILTER control settings.
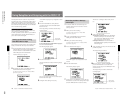
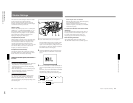
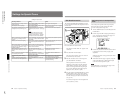
White Balance Adjustment
1
21
513
4
(continued)