58
Limit Line
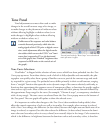
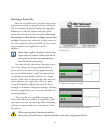
On the left side of the tone graph is a curved green line that never moves. is is the line that
denotes the limit for conversion from the 14-bits/channel of the raw camera image to 8-bits/channel
in the image file without skipping any values. If a tone curve is created or modified in such a way as
to have the tone curve go into this area, the resulting image’s histogram may have gaps. e gaps rep
-
resent RGB values that are skipped as tones progress along the tone curve. ese skipped RGB values
may, or may not, be visible, depending on the image’s subject matter. If these gaps occur in parts of
the tone scale where there are gradations, there might appear some sudden steps instead of a smooth
tone transition. Skipped RGB steps will not be a problem if there are no colors in the image that fall
in the area where the tone curve is inside the limit line, as shown by the image data histogram in the
background of the Tone editing area. e limit line is not usually crossed in normal shooting situa
-
tions.
Spot Meter Reference Points
When static spot meters have been set in the prescan image, they will also be marked on the tone
curve graph as small square points, to distinguish them from the round control points, with their
respective color coding. e RGB values for the spot meters are displayed on the left side of the tone
curve graph to aid in the curve adjustments. As brightness or contrast changes are made to the tone
curve, the static meter reference points will automatically move along the curve to reflect their new
positions and the RGB values will update. ese features can be used to watch specific values in the
image. Set a static spot meter in the prescan image on a point of interest, such as a highlight, with the
Spot Meter Tool. en, as you make changes to the tone curve, you can see the spot meter reference
point move along the curve, making certain it arrives at the desired point in the tone scale on the left
side of the tone graph.
Negative Curves
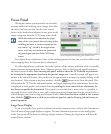
A curve for converting negatives to positives can be created and applied to the image by clicking
on the Negative button
. e tone curve will invert to correctly convert the negative scanned image
into a positive image for display. A negative original scanned with a negative curve will result in a
positive image.
16-bit Tone Curves
Clicking on the 16-bit button in the Tone panel will cause ViewFinder to save the image as
16-bit per channels with the current tone curve applied. e preview display will be unaffected but
the file size will be doubled. See page 54 for more information.


