


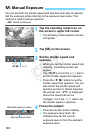


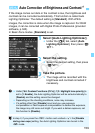
Auto Exposure BracketingN
156
4
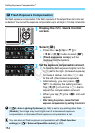
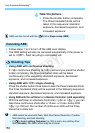
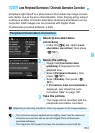
Take the picture.
Press the shutter button completely.
The three bracketed shots will be
taken in this sequence: standard
exposure, decreased exposure, and
increased exposure.
Follow steps 1 to 3 to turn off the AEB level display.
The AEB setting will also be canceled automatically if the power is
set to <2>, flash recycling is completed, etc.
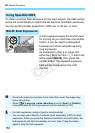
Using AEB with continuous shooting
If <i> continuous shooting (p.133) is set and you press the shutter
button completely, the three bracketed shots will be taken
continuously in this sequence: standard exposure, decreased
exposure, and increased exposure.
Using AEB with <u> single shooting
Press the shutter button three times to take the three bracketed shots.
The three bracketed shots will be exposed in the following sequence:
standard exposure, decreased exposure, and increased exposure.
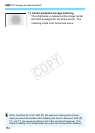
Using AEB with the self-timer or a Remote Controller (sold separately)
With the self-timer or a Remote Controller (<Q> or <l>), you can
take three continuous shots after a 10-sec. or 2-sec. delay. With
<q> (p.136) set, the number of continuous shots will be three
times the number set.
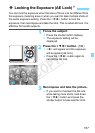
Canceling AEB
Shooting Tips
AEB can also be set with the [A3] tab’s [Expo.comp./AEB].
AEB cannot be used with flash, Multi Shot Noise Reduction, Creative
filter shooting, and bulb shooting.
If [A3: Auto Lighting Optimizer] (p.159) is set to any setting other
than [Disable], the AEB’s effect may be minimal.
COPY