


117
ADVANCED SETTINGS
NOT
E
• You also can change the white balance setting using the
menu that appears when you press [MENU] (pages 51,
233).
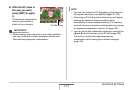
• When “Auto” is selected for the white balance setting, the
camera automatically determines the white point of the
subject. Certain subject colors and light source conditions
can cause problems when the camera tries to determine
the white point, which makes proper white balance
adjustment impossible. If this happens, select the white
balance setting that matches you shooting conditions
(Daylight, Overcast, etc.)
• You can use the key customization feature to configure the
[W] and [X] buttons so they control the white balance
setting (page 128).
• To select “Auto” with the control key (when the control key
is configured to select the auto white balance setting),
scroll through the settings until “ ” appears on the
monitor screen.
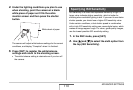
■ Configuring the White Balance Setting
Manually
Under complex lighting conditions, the preset white balance
settings may not be able to produce natural looking colors.
When this happens, you can configure the white balance setting
manually for particular lighting conditions. Note that you will
need to have a plain white sheet of paper on hand when
performing the following procedure.
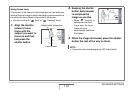
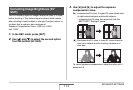
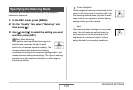
1. In the REC mode, press [SET].
2. Use [S] and [T] to select the third option from
the bottom (White Balance).
3. Use [W] and [X] to select “ Manual WB”.
This will display the subject that the lens is aimed at on the
monitor screen using the current manual white balance
settings. If you want to use the current settings, jump
directly to step 5.
AWB
MWB