122
Printing Directly from the Camera Using PictBridge
By using a PictBridge (see “Glossary” p.198) -compatible printer, you can
print directly from the camera without using a PC.
ATTENTION
• You should connect the AC adapter when printing still images.
If the battery runs flat while images are being printed, printing stops and the
camera automatically turns off. If this happens, connect the AC adapter or ensure
that the battery is fully charged before printing the images again.
• The camera is not guaranteed to connect successfully to all PictBridge-
compatible printers.
• If you disconnect the USB cable while the camera is connected to a printer,
malfunctions may occur.
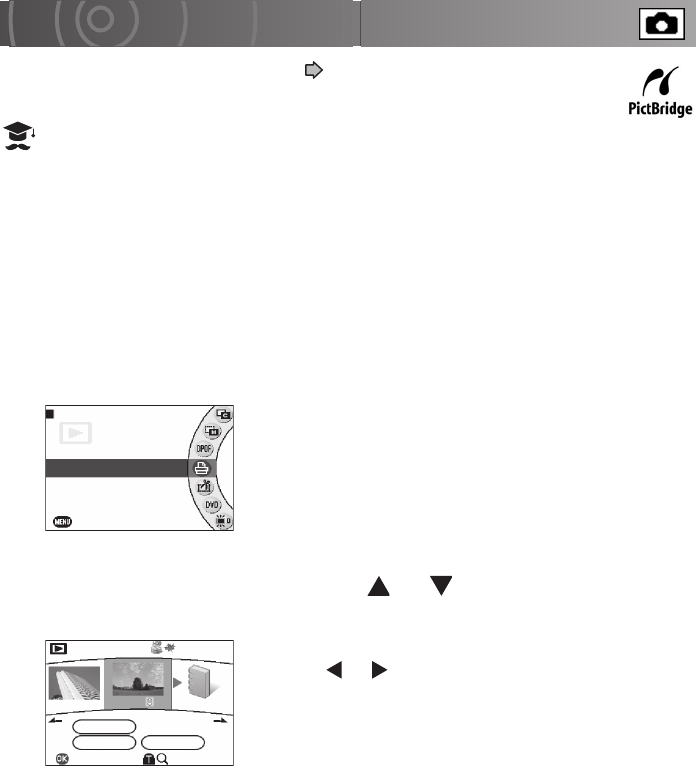
1
From the play menu, use the jog dial to select [PictBridge]
and press the OK button.
2
Use the jog dial to select the still image to be printed and
then move the OK button to or to set the number of
prints.
To move to the previous or next album, move the OK
button to or respectively. You can set up to 99
prints in all.
3
When you have finished setting the number of prints,
press the OK button.
4
Use the jog dial to select [OK] and press the OK button.
A printer connection message is displayed.
5
Connect the camera to the printer with the USB cable.
When the connection is completed, the print settings screen appears.
MOVE
DVD CREATION LIST
VIDEO EDITING
EXIT
PLAY MENU
DPOF
PictBridge
OK
OK
SELECT ALL
CANCEL
PictBridge
TOTAL 00
00
00
100-0025
NEXT ALBUM


