


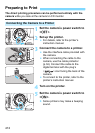


w Printing
416
4
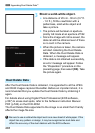
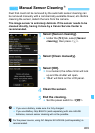
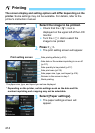
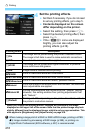
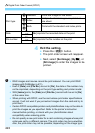
Set the printing effects.
Set them if necessary. If you do not need
to set any printing effects, go to step 5.
Contents displayed on the screen
differ depending on the printer.
Select the setting, then press <0>.
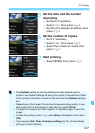
Select the desired printing effect, then
press <0>.
If the <ze> icons are displayed
brightly, you can also adjust the
printing effects (p.418).
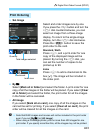
* When you change the printing effects, changes are reflected in the image
displayed on the upper left of the screen. Note that the printed image may look
slightly different from the displayed image, which is only an approximation. This
also applies to [Brightness] and [Adjust levels] on page 418.
Printing Effect Description
EOn
The image will be printed using the printer’s standard colors.
The image’s Exif data is used to make automatic corrections.
EOff No automatic correction will be applied.
EVIVID
The image will be printed with higher saturation to produce
more vivid blues and greens.
ENR
Image noise is reduced before printing.
0 B/W
Prints in black-and-white with true blacks.
0 Cool tone
Prints in black-and-white with cool, bluish blacks.
0
Warm tone
Prints in black-and-white with warm, yellowish blacks.
zNatural
Prints the image in the actual colors and contrast. No automatic
color adjustments are applied.
zNatural M
Printing characteristics are the same as the “Natural” setting.
However, this setting enables finer printing adjustments than
with “Natural.”
EDefault
Printing will differ depending on the printer. For details, refer to
the printer’s instruction manual.
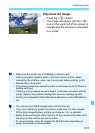
When making a large print of a RAW or RAW+JPEG image, printing a JPEG
73 image created by processing a RAW image (p.398), or printing via
Digital Photo Professional (EOS software, p.537) is recommended.