


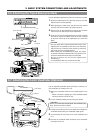
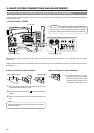

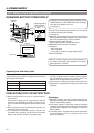
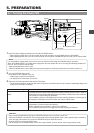
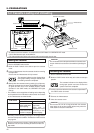


5. PREPARATIONS
43
ALARM
MONITOR
B
AL
O
LUX
AUDIO SELECT
MANUAL
AUTO
CH-1 CH-2 CH-1 CH-2
REAR
FRONT
RM
AUDIO INPUT
MODE
CH-1
AUDIO
LEVEL
CH-2
VTR
ON
OFF
INCOM
MIC
INCOM
MIC
LEVEL
POWER
OFFRM
DC IN
/BATT.
CALL
CARBON
DYNAMIC
MENU
OVER
OVER
LIGHT
ON
OFF
COUNTER
CTL
TC
UB
RESET
OPERATE/WARNING
MONITOR
SELECT
E
REV FWD
FBATT
H
HM
MSF
REMAIN
AUD LOCK
32k
CH 1
CH 2
48k
PB NDF
AUTO OFF DEW
L iRFSERVO
HOLD
SP
40 30 20 10 0
dB
CH-1
MIX
CH-2
WIDE
SLAVE
AUDIO SELECT
CONTINUE
MANUAL
AUTO
INT
EXT
AUX
GROUP ITEM SELECT DATA SET
HOLD SHIFT ADVANCE PRESET
CAM
CH-1 CH-2 CH-1 CH-2
REAR
FRONT
AUDIO INPUT
CH-1
SEE
INSTR-
UCTION
MANUAL
CH-2
AUDIO
LEVEL
VTR SELECT
VTR INPUT
PARA
REC
FREE
PRST
REGEN
TC GENE.
MENU
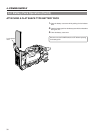
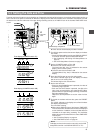
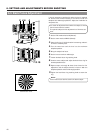
LITHIUM BATT.
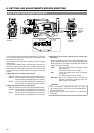
Lithium battery compartment
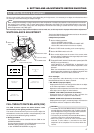
2.
COUNTER
switch
3.
HOLD
button
4.
SHIFT button
5.
PRESET button
4.
ADVANCE button
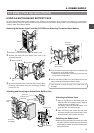
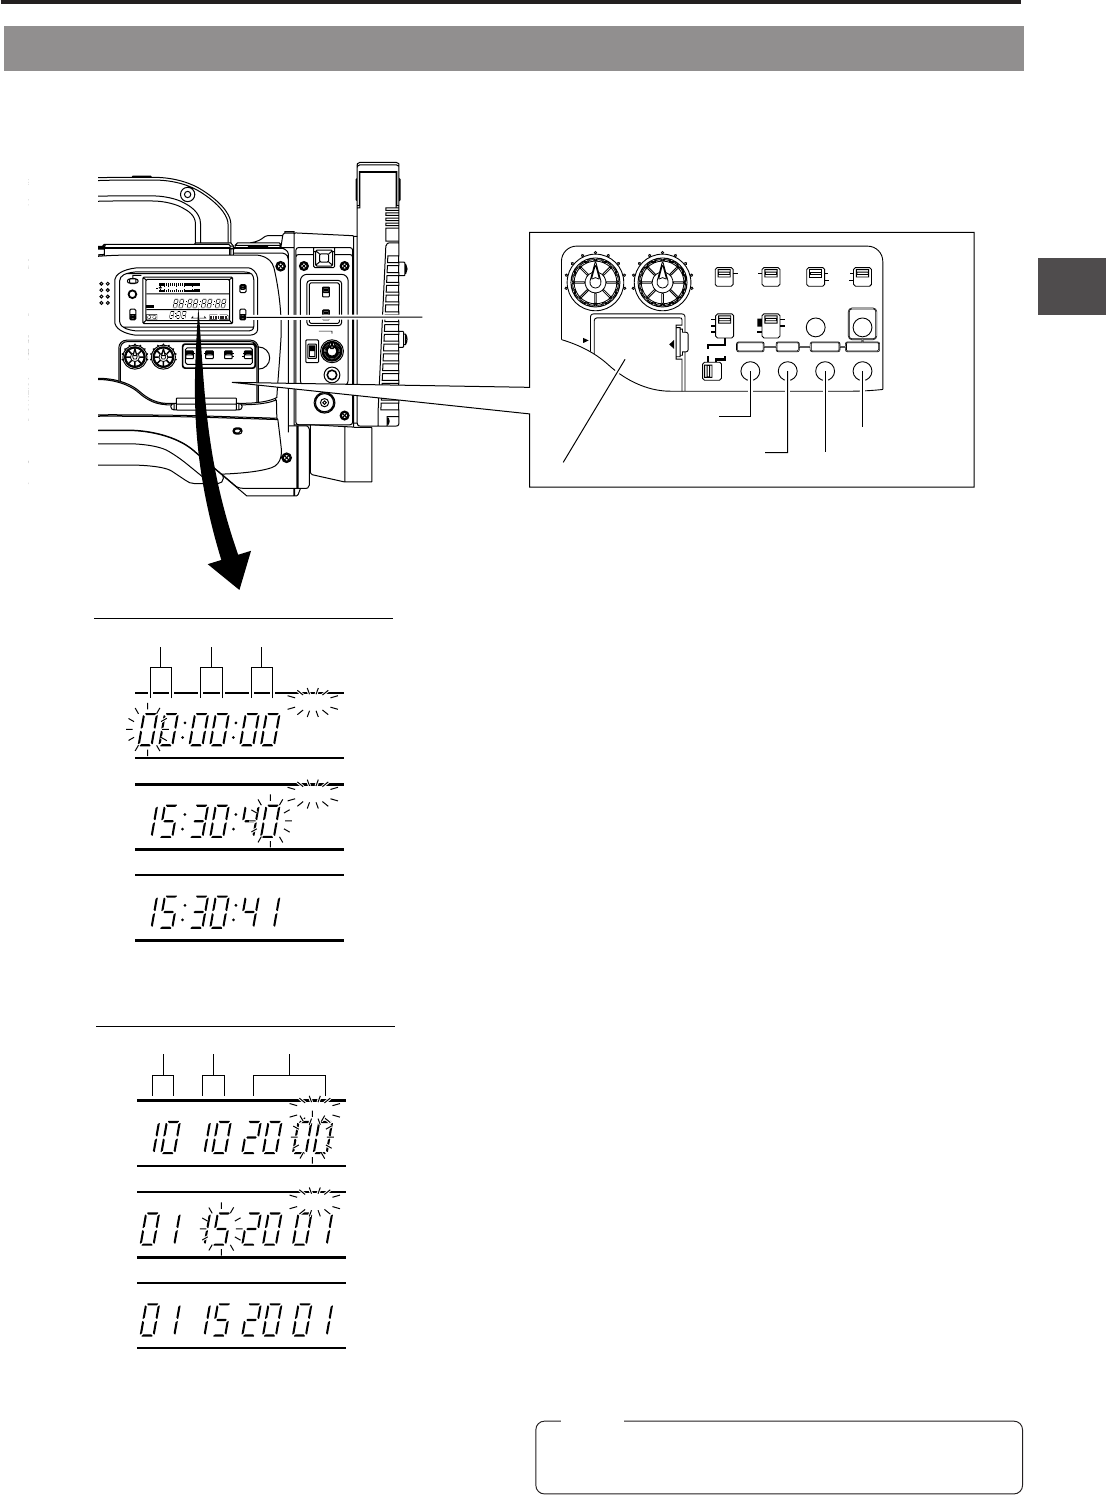
H M S
HOLD
H M S
HOLD
H M S
Time display (COUNTER switch: TC)
HOLD
HOLD
Date display (COUNTER switch: UB)
Day
Hour Min. Sec.
Month Year
Memo:
Ⅲ Check that the lithium battery has been inserted.
1.
Turn ON the power and set the counter display to the date/
time mode.
• Set the VCR Setup Menu item No. 516 DISPLAY SELECT
to “CLOCK” and then press the DATA SET button.
☞ See “Displaying and Setting VCR Setup Menus” on
page 73.
☞ See “VCR Setup Menu Contents” on page 75.
2.
Set the COUNTER switch to TC or UB.
Ⅲ To set the time: Set the switch to TC.
The time (Hour, Min., Sec.) is indicated on the counter
display. (24-hour clock system)
Ⅲ To set the date: Set the switch to UB.
The date (Month, Day, Year) is indicated on the counter
display.
3.
Press the HOLD button to enter the setting mode.
The “HOLD” indicator lights up on the display to indicate
that the unit is in the setting mode.
The leftmost digit on the counter blinks.
4.
Set the date and time.
• Each time the ADVANCE button is pressed, the value of
the blinking digit increases.
• Each time the SHIFT button is pressed, the digit to the
right of the currently blinking one starts blinking. When
pressed while the rightmost digit is blinking, the leftmost
digit starts blinking again.
Repeat the above procedure to set the value of all the
digits.
5.
To decide the set date and time data, press the PRESET
button.
The “HOLD” indicator on the display turns off and the date/
time display stops blinking.
The time starts counting.
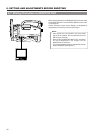
Ⅲ When setting DISPLAY item of the Camera TIME DATE
menu screen to ON, the date and time data are displayed
on the viewfinder. In addition, the time and date data are
recorded on the tape during recording. The viewfinder
display format can be selected in the Camera TIME DATE
menu screen.
☞ See “Time/Date Display” on page 30.
☞ See “TIME DATE screen” on page 84.
To display and set the time code or user’s bit, set the VCR
Setup Menu item No. 516 DISPLAY SELECT to “TC”.
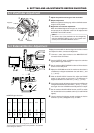
5-3 Setting the Date and Time
The date and time of the built-in clock should be set. Powered by the backup lithium battery, the set date and time data continue to
count even when the power is switched off. Whether to display the set date and time data on the viewfinder and whether to record
the data on the sub-time code area of the tape during recording can be set in DISPLAY item of the Camera TIME DATE menu
screen.