


21
Preparations
Attaching the Zoom Lens
(Supplied with GY-HM790U/GY-HM790E only)
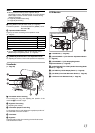
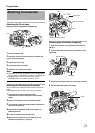
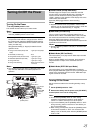
1
Loosen the mount ring.
2 Attach the zoom lens such that the pin matches the
hole of the mounting area.
3 Tighten the mount ring.
4 Connect the cable connector.
5 Attach the lens cable to the clamp.
Memo :
●
Tighten the mount ring completely. If it is not fully tightened,
the lens may drop or the back focus may be out of alignment.
●
When attaching or removing the zoom lens, set the
[POWER] switch of the camera recorder to
A
OFF
B
.
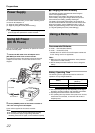
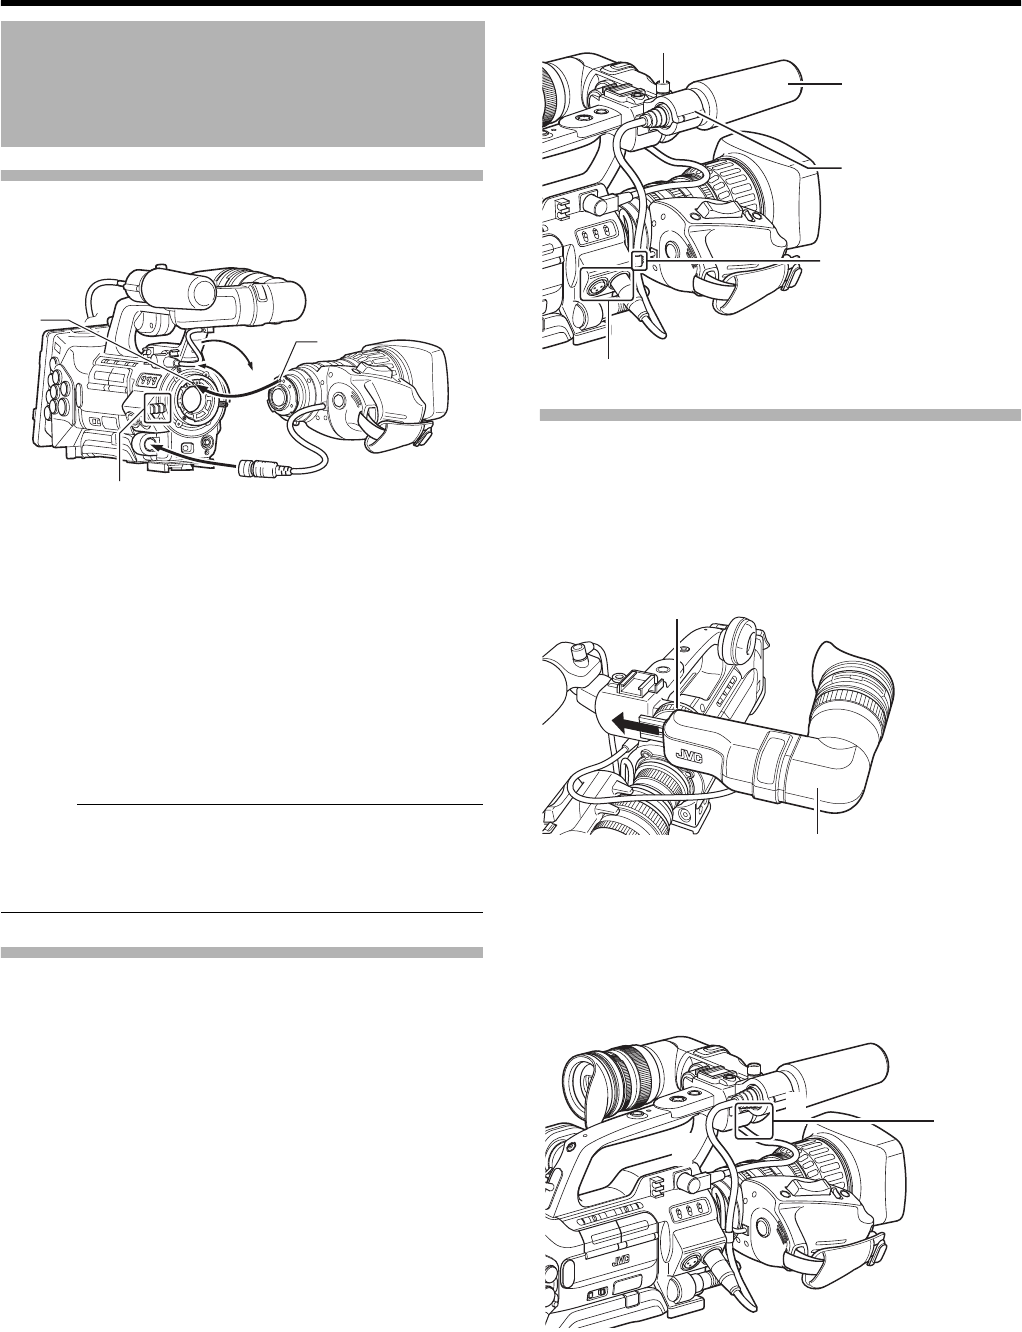
Attaching the Microphone (Supplied)
You can attach the supplied microphone to the microphone
holder.
The supplied microphone has a phantom power supply.
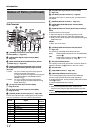
1 Turn the knob on the microphone holder
anticlockwise to loosen and open the microphone
holder.
2 Place the microphone in the microphone holder.
3 Turn the knob on the microphone holder clockwise to
secure the microphone.
4 Connect the microphone cable to the [INPUT1] or
[INPUT2] terminal.
5 Pin the microphone cable to the clamp.
6 Make sure to perform the correct settings for the
phantom microphone (A Page 46).
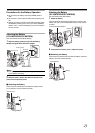
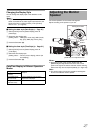
Attaching the Viewfinder (Supplied)
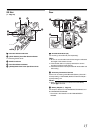
1 Slide the viewfinder in the direction of the arrow to
attach it.
2 Turn the slide lock ring to secure the position of the
viewfinder.
3 Attach the viewfinder cable to the viewfinder terminal.
4 Pin the viewfinder cable to the clamp.
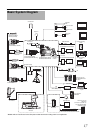
Attaching Accessories
REC
1
2
3
4
Pin
Hole
Clamp
Microphone
Microphone Holder
Clamp
[INPUT1/INPUT2] Terminal
Knob
1
2
Viewfinder
Slide Lock Ring
3
4
Clamp