


VI Basic Operations TOOL
3 Measuring Two-point Distance or Entering Information—TOOL Menu
- 71 -
3.4
Measuring on the Screen
Once you calibrate the reference length, you will have a simple means of measuring distances.
You can save seven calibration values for each objective or measurement condition and reuse
saved values by calling them up the next time you perform a measurement.
3.4.1 Performing Calibration and Saving Values
Before measuring the length of anything, you must first calibrate the reference length. Be aware
that you cannot perform measurement if you skip the calibration process.
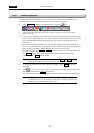
There are two ways to calibrate: You can use a subject of known length
, or you can use the
magnification of the objective and relay lenses
. You can switch between these two methods
by right-clicking the Calib. icon. (The icon will change accordingly.)
<When using a subject of known length>
NOTE: If the microscope connected to your system is the Nikon 80i/90i microscope,
set the magnification of the digital imaging head optical zoom to x1.0 before
calibrating.
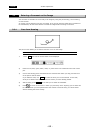
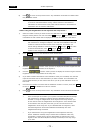
1) Select the number in which you want to save the calibration value (from s1 through
s7 ).
Drag the mouse pointer over one of numbers s1 through s7 , and the calibration
information for that number will be displayed in the Info area for your confirmation.
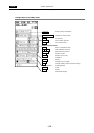
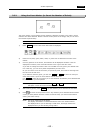
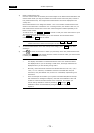
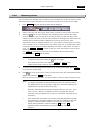
2) Press Calib. to bring up a calibration screen like the one shown below.
3) Draw a calibration line about the length of a specific subject on the image that you want to
be the reference.
Click the mouse button at the starting point of the object to be measured. To draw a line,
hold the mouse button while you drag it to the end point, then release the mouse button.
To redraw a line, use Clear to erase the line you’ve just drawn.
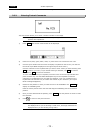
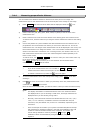
4) When you have finished drawing a line, click the number input box to display a numeric
keypad.
After entering any number, press Ent .
5) Select the unit of measure. (nm, µm, mm, cm)
6) If you want to attach information to the calibration value you’ve created, click the Info
input box and enter text for the information you want to attach. This information will
prove helpful because you can confirm Info when you call up the calibration value at a
later time.
7) Check the Set number to see if the calibration number is correct and press Save to save.
Unless you enter a numeric value and a unit, you cannot press the Save button. If you
want to recalibrate, use Clear to erase the current calibration value before saving it.
Icon when using a subject of known length
Icon when using the magnification of the objective and relay lenses