


VI Basic Operations TOOL
3 Measuring Two-point Distance or Entering Information—TOOL Menu
- 77 -
3.4.6 Measuring circles
You can measure the diameter and circumference of circles drawn on the screen and save circles
and measurement results (diameter and circumference) as part of the overlay for the image.
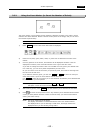
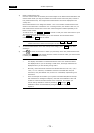
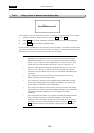
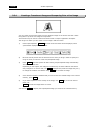
1) Press Measure . The tool bar shown below will be displayed.
2) Press a color icon (red, blue, green, black, white, or yellow) to set the color of the circle.
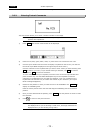
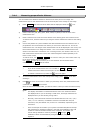
3) Select the
icon. A circle of arbitrary size is displayed in the center of the image.
To move the circle, click near the center and drag to where you wish the object to be
located. To resize the circle, click near the circumference and drag to the desired size. The
diameter and circumference will be displayed in the vicinity of the center. Each
measurement result is assigned numbers 1 to 9. The number of circles drawn in the same
color is limited to nine. To change colors, click another color icon, so measurement results
in that color will be assigned numbers separately from those in other colors. To redraw a
circle, use Undo or Redo to cancel or redo your most recent action. Up to 10 recent
actions can be retrieved.
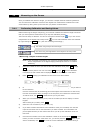
Use Clear to erase all the content you’ve now entered. All lines drawn before
confirmation with Paste will be erased.
NOTE:
* To measure a new circle, select the icon once again.
* If you draw a new circle in the middle of Undo or Redo , recent
measurement results cannot be canceled.
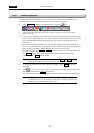
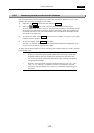
4) To save a circle and its measurement results to the overlay of the image, press Paste
to fix after the measurement.
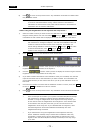
5) Press
to return to the menu in which you previously were. Only measurement results
angles confirmed with Paste will be saved.
Once the content is fixed as valid, you cannot erase it unless you erase the entire overlay.
NOTE:
* The display information is interlocked with the menu size. Small characters
are displayed when you are showing a small menu, and large characters are
displayed when you are showing a large menu.
* Normally, values with these functions are labeled with the units "nm," "µm,"
"mm," or "cm." However, if calibration values are selected after inch/mil
conversion, they are labeled "mil," and an "E" is indicated, representing inch
conversion.
* If the microscope connected to your system is the Nikon 80i/90i microscope
with motorized or intelligent nosepiece, note that each calibration value call
number is linked to the hole number of the nosepiece. This means you
cannot change calibration values by selecting s1 through s7 .
Calibration values are automatically changed when you change the
objective.