


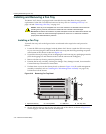

Installing and Removing a Fan Tray
Matrix X4-C Chassis Installation Guide 3-17
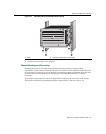
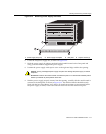
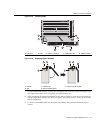
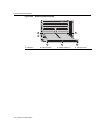
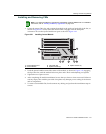
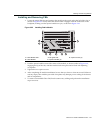
Figure 3-17 Installing Fan Tray
7. Replacethefantraybezelbyliftingitintoplaceandre‐attaching thethreecaptivescrews.
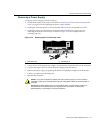
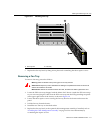
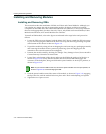
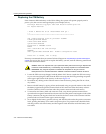
Removing a Fan Tray
Toremoveafantray,proceedasfollows:
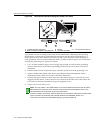
1. LocatetheESDwriststrapshippedwiththeMatrixX4‐Cchassis.AttachtheESDwriststrap
toyourwristandplugthecablefromtheESDwriststrapintotheESDgroundingreceptacle
attheupperrightcornerofthechassis,as
showninFigure 3‐9.
2. Loosenthethreecaptivescrewssecuringthefantraybezeltothechassisandremovethe
panel.
3. Pullthefantrayfromthechassis.
4. Installthenewfantrayasdescribedearlier.
5. Replacethefantraybezel(ortheoptionalcablemanagementassembly,ifinstalled;referto
“Installing
theCableManagementAssembly”onpage 3‐35formoreinformation)by
re‐attachingthecaptivescrews.
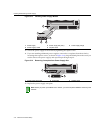
1 Fan tray slot 2 Fan tray
FM2
FM1
S/N: MAC ADD.
GROUND
STRAP
ALLOW FAN BLADES
TO STOP PRIOR TO
FAN TRAY REMOVAL
STATUS
1
2
Warning: Allow fan blades to stop running prior to fan tray removal.
Advertencia: Espere a que los ventiladores se detengan completamente antes de remover el
sistema de ventilacion del chasis.
Warnhinweis: Warten sie mit dem Ausbau der Lüfter, bis diese zum Stehen gekommen sind.