


. . . . . . . . . . . . . . . . . . . . . . . . . . . . .
6-26 Accessing Camera Images
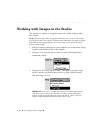
Working with Images in the Studio
This section is a tutorial on using the camera in a studio setting to take
new images.
NOTE: The earlier part of this chapter describes how you can work with images
on a PCMCIA card in the camera. All features described there also apply to studio
work (and are not repeated below), so we encourage you to review the earlier
sections of this chapter.
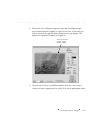
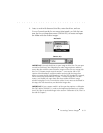
1. With the camera connected to your computer, access the driver image
window as described earlier in this chapter.
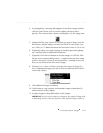
2. Choose C
AMERA from the SOURCE menu to work with images from a
connected camera.
3. Choose TEST SHOT from the VIEW menu. This displays a single image
which is always the most recent picture you take with the camera
after choosing T
EST SHOT.
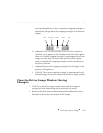
IMPORTANT: In TEST SHOT, images you take are not saved to the PCMCIA
card in the camera unless you click the K
EEP button as described below;
instead, images are displayed in the image area one at a time. Each new
image you take replaces the previous one, which is lost.