


. . . . . . . . . . . . . . . . . . . . . . . . . . . . .
8-36 Reference — Kodak Driver Software
NOTE: In addition to this tool, the driver provides a lighting menu described in
the last section. Lighting can be set with either lighting option. However, lighting
choices are mutually exclusive; you cannot apply one type of lighting and then
refine it with another. Instead, each time you apply any color balancing, your
previous choice is lost, and only the current lighting setting is applied. Click-
balance is always the preferred method of applying color balancing to images.
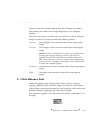
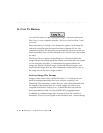
You use this tool to set color balancing for a single image (selected or
unselected) or for a set of selected images. This icon provides an addi-
tional type of color balancing to those provided on the lighting menu
described in the last section. This feature is always the preferred option for
color balancing an image.
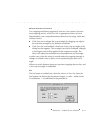
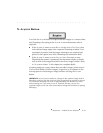
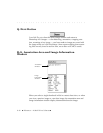
To activate this feature, first click its checkbox “on” (an X appears in the
check box to the left of this option when on). Then, when you move the
cursor over an image in any view (C
ONTACT SHEET, PREVIEW, or TEST SHOT),
the cursor changes to an eyedropper cursor.
You then click the eyedropper on an area of the image that is white or
light gray (an area that is not overexposed), or click a point that should be
white or light gray. White balance values for the entire image are calcu-
lated based on averaging a 16 x 16 pixel square around the point at
which you have clicked.
After that single click, the eyedropper cursor is no longer available,
although the click-balance tool remains on. If the adjustment was not
satisfactory, click the cursor on the eyedropper portion of the click-
balance tool; this changes the cursor to the eyedropper cursor again. Then
click another point in the image. Repeat the process as needed
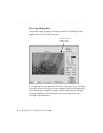
When using the click-balance tool, we suggest that you view the image
you want to balance in P
REVIEW view, since it displays a larger image and
therefore allows you to find a click point more easily. With the image you
want displayed in P
REVIEW view, move the cursor to a white or light gray