


. . . . . . . . . . . . . . . . . . . . . . . . . . . . .
Using the Camera 5-3
NOTE: The AC adapter supplies enough power to support operation of
the camera as well as to continue charging the camera battery. Once
the battery is fully charged, the AC adapter automatically switches to a
slow trickle charge.
B.
In the field without the AC battery charger/adapter.
Before you go
into the field, you should charge the battery fully as described in
Chapter 4; charging the battery for at least two hours will ensure
the most images per charge.
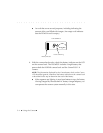
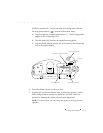
4. If the camera is connected to the AC battery charger/adapter it is
automatically on. However without the adapter, turn on the camera
by sliding the power switch to on (I); this switch turns on both the
KODAK camera back and the Canon camera body.
NOTE: The main switch on the Canon EOS-1 N is not available. Instead, the
on (I) setting of the EOS
•
DCS power switch sets the EOS-1 N into the “A”
setting, and the off (O) setting sets it into the “L” setting.
The
)
)
)
setting is also available on the EOS
•
DCS; to set it, set custom
function 3 to 1. (For the EOS
•
DCS camera the purpose of custom function 3
has been reprogrammed. It no longer is used to set film speed — a function of
no use with the digital camera.)
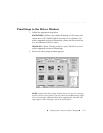
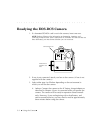
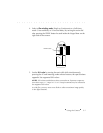
5. Notice that the camera back LCD displays several graphics. (To
conserve battery power, if the AC adapter is not connected, the
camera back automatically turns off after approximately five seconds;
to wake it and see these data, lightly press the shutter release button.)
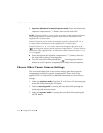
The graphics display:
The amount of charge in the battery.
The number of frames remaining on the PCMCIA card. For
example the following illustration indicates that there is still room
for 64 additional images on the card.