


. . . . . . . . . . . . . . . . . . . . . . . . . . . . .
Reference — Camera 7-39
Cleaning the Imager
The imager is the component of the camera that records light when you
take a picture. Even though it is located inside the camera, it is still
possible for the imager to become dirty.
The directions in this section describe how to determine if the imager
needs cleaning, and how to clean the imager.
Determining If the Imager Is Dirty
There are two ways to determine whether the imager needs cleaning:
You can take a test picture and look for imperfections in the image
that indicate dirt on the imager.
You can visually inspect the imager for dirt.
Both techniques are described below.
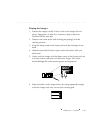
Technique 1: Examine a Test Image
1. Set up the camera to operate while connected to a computer.
2. Set the lens aperture to its highest f number, to provide for maximum
depth of field.
3. Take a photograph of a plain white object like a clean, white wall.
4. Examine the image on the computer monitor; imperfections in the
image, such as dark clusters or streaks, may indicate a dirty imager.
Technique 2: Visually Inspect the Imager
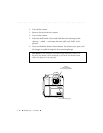
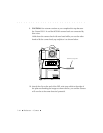
1. Set up your camera to operate in stand-alone mode (not connected to
either a computer or the AC battery charger/adapter).