


. . . . . . . . . . . . . . . . . . . . . . . . . . . . .
Reference — Camera 7-15
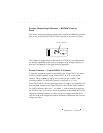
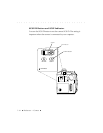
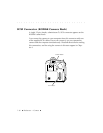
To set the SCSI ID,
first make sure the camera is not connected to your
computer
. Then turn on the camera and lightly press the shutter release
button (this is not necessary if you are connected to the AC battery
charger/adapter) to wake the camera. Then, press the SCSI ID button once
with your fingertip or other blunt object to wake SCSI mode. The charac-
ters “SCSI” — the SCSI indicator — appear on the camera back LCD as
does the current SCSI ID value, a single digit from 0 to 7, “PC” or “PP.”
As long as the characters “SCSI” appear on the LCD, you can press the
SCSI ID button again and again to rotate through the available values.
Stop when you have selected the SCSI ID you want. Several seconds after
you press the SCSI ID button for the last time, SCSI mode turns off; reacti-
vate it — if needed — and press the SCSI ID button again.
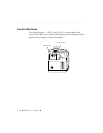
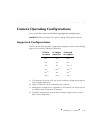
Select the appropriate SCSI ID before you connect the camera to your
computer. Select an ID that is different from the SCSI ID of any other
connected SCSI devices.
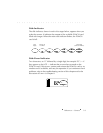
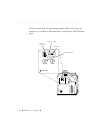
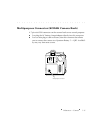
“PC” SETTING FOR AN IBM OR COMPATIBLE LAPTOP (PC) CUSTOMERS (Not
for use with the Macintosh): Use the “PC” SCSI ID setting only if you will be
connecting the camera to an IBM or compatible laptop computer using a
PCMCIA-to-SCSI II adapter (such as the Adaptec SlimSCSI used with EZ-SCSI 4.0
or the New Media Bus Toaster), to connect the PCMCIA slot on your laptop (not
the camera) to the SCSI connector on the camera. “PC” sets the SCSI ID of the
camera to 1 and turns on active termination in the camera.
When you finish, take the camera out of “PC” mode, turn off the computer and
camera. If left in “PC” mode, a fully charged battery will be exhausted in approxi-
mately eight hours since the camera can not change to low power mode when
this SCSI setting is active.
“PP” SETTING: the “PP” setting, although it appears, is not currently supported
and should not be selected.