39
Using the Main Menu
• Click on the edge of a privacy area and
drag to resize a privacy area.
• Right-click when you are finished to exit.
5 (Optional) Use the
drop-downs next to
Copy to copy privacy areas to another
channel or all channels. Click the Copy
button to copy privacy areas.
6 Click A
pply to save your settings.
Creating a Custom Split-screen
Display (ECO Blackbox+ Series
Only)
You can create a custom split-screen
display and re-arrange where channels
are placed.
TIP:
You can use the steps below to
create a cus
tom split-screen display on
a secondary monitor connected to the
Video Out port. First, move the mouse
and system interface to the Video Out
monitor by pressing 0 three times on
the remote control. Complete the steps,
and then press 0 three times on the
remote control again to return the
mouse and system interface to the VGA
or HDMI monitor. Your custom display
will be saved on the secondary monitor.
To re-arrange the split-screen display:
1 Se
lect the Output ta
b.
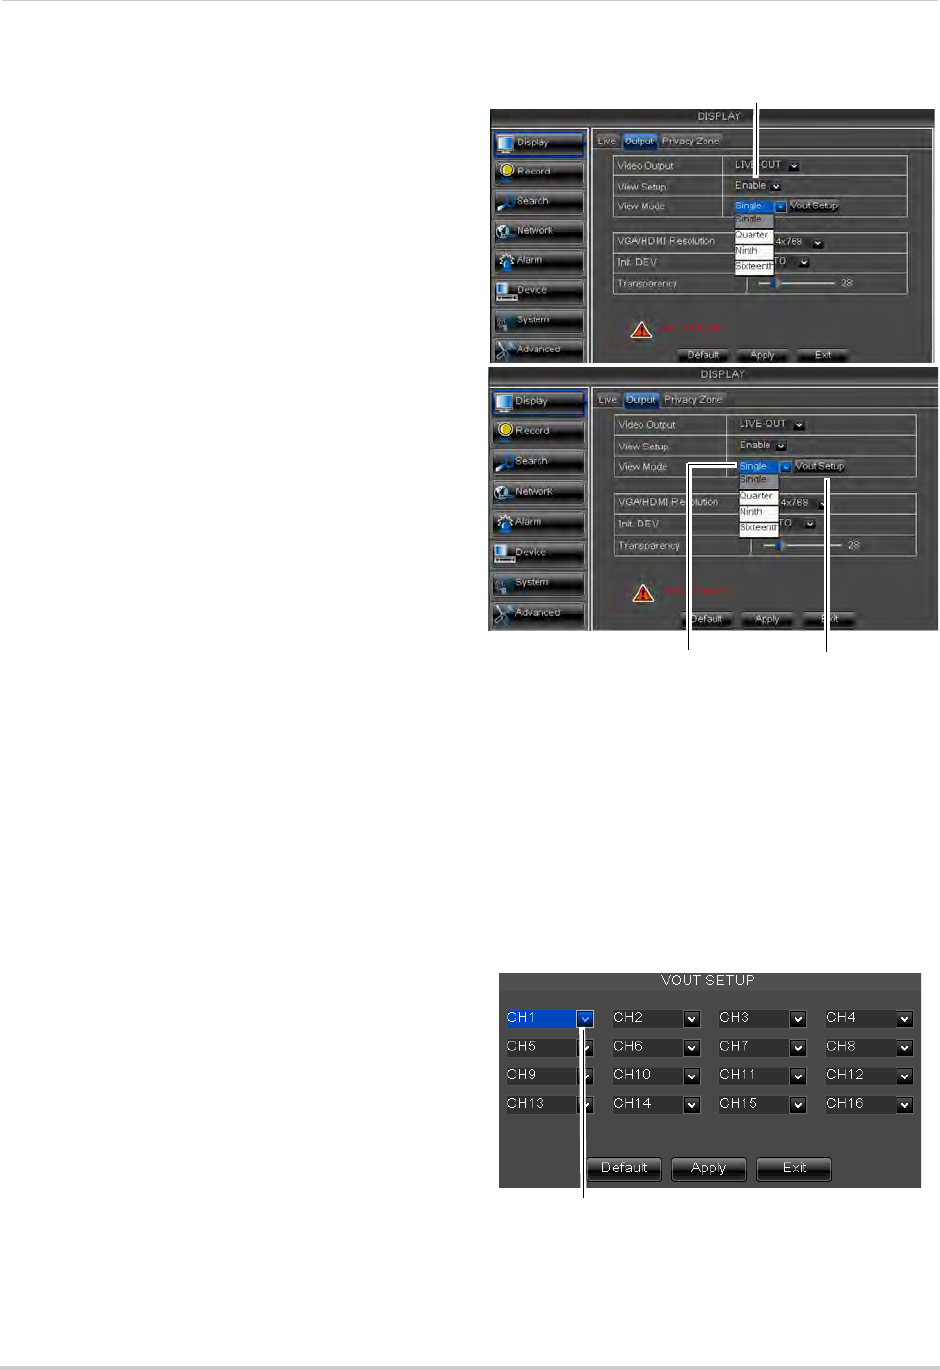
2 Under Vie
w Setup, select Enable. This lets
you select and arrange the channels you
want to show on the screen.
NOTE: Enabling Vie
w Setup disables your
ability to change channels the
normal way on the selected monitor.
You will need to disable View Setup
to return to normal operation.
Select display mode
Click Vout Setup
3 Under View Mode, select the desired
viewing mode: Single, Quad, Nine, or
Sixteen.
4 Click Vou
t Setup. A menu appears that
allows you to select the arrangement of
channels.
5 Click the
dr
op-down menus to select
which channels to show on the screen and
the arrangement of channels.
Select the arrangement of channels on screen
6 Click Apply to save changes. Click Ok.
Right-click repeatedly to exit all menus
and return to live viewing.


