


17
Chapter 2 Parts and their Functions
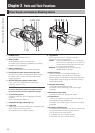
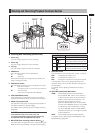
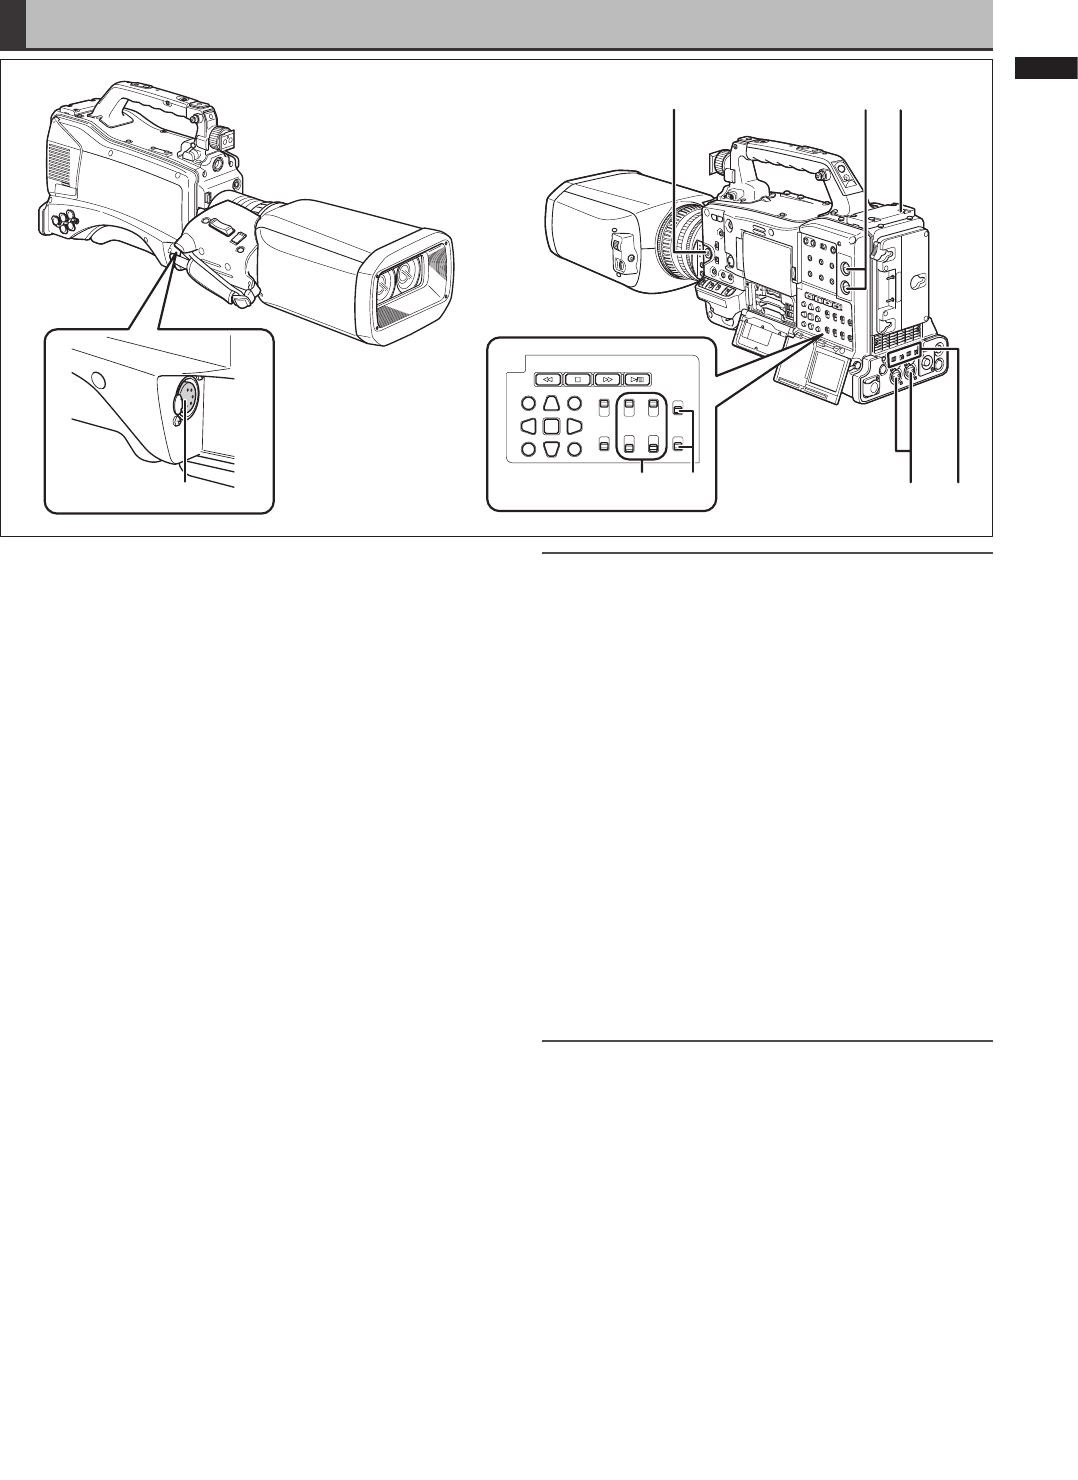
Audio (input) Function Section
1
4
827
3
65
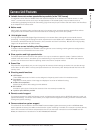
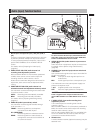
1 MIC IN (front microphone input) +48V jack (XLR, 5-
pin)
Connect a microphone (optional accessory) to this jack.
A phantom-powered microphone may be connected.
To use a phantom-powered microphone, set the menu
option F.MIC POWER to ON in the AUDIO SETUP
screen.
For details, refer to [Preparing for Audio Input]
(page 87).
2
AUDIO LEVEL CH1/CH2 (audio channel 1/2
recording level adjustment) controls
With the AUDIO SELECT CH1/CH2 switch positioned
to MAN, these controls can be used to adjust the
recording levels for audio channels 1 and 2.
Note that the controls are designed to be locked. For
adjustment, each control must be depressed while
turning.
3
AUDIO SELECT CH1/CH2 (audio channel 1/2
automatic/manual level adjustment selector) switch
Use this switch to select recording level control mode
for audio channels 1 and 2.
A
UTO: Recording level automatically controlled.
MAN: Recording level manually controlled.
For details, refer to [Adjusting Recording Levels]
(page 51).
4 AUDIO IN (audio input selector) switch
Use this switch to select signals recorded through
audio channels 1 – 4.
FR
ONT: Records signals from a microphone
connected to the MIC IN jack.
W.L.(WIRELESS):
Recor
ds signals from a wireless receiver.
REAR: Records signals from audio devices or
microphones connected to the AUDIO IN
CH1/CH2 connectors.
NOTE
To record 2-channel wireless input, switch both CH1 and
CH2 to W.L. position and set the menu option WIRELESS
TYPE in the AUDIO SETUP screen to DUAL.
5 AUDIO IN CH1/CH2 (audio channel 1/2) connectors
(XLR, 3-pin)
Audio devices or microphones may be connected here.
For details, refer to [When Using Audio Devices]
(page 88).
6
LINE/MIC (line input/mic input) selector switch and
+48V switch
Use to select audio signals to be input to the AUDIO IN
CH1/CH2 connectors.
LINE:
Line input for audio signals input from an
audio device
MIC:
Audio signal input from a microphone input
The +48V switch turns the internal power supply to a
phantom microphone on/off.
+ 48V
: Supplies power to the microphone.
OFF: Does not supply power the microphone.
NOTE
Power is supplied to the microphone when the menu
option R.MIC POWER in the AUDIO SETUP screen is set to
ON.
7 F. AUDIO LEVEL (front audio recording level
adjustment) control
This control adjusts the recording level of audio
channels 1 and 2.
With the AUDIO SELECT CH1/CH2 switch positioned to
MAN, this control can be used to adjust the recording
levels for audio channels 1 and 2.
Use the menu options FRONT VR CH1 and FRONT VR
CH2 in the AUDIO SETUP screen to select the input
connector this control will be used for.
8
Wireless slot
A Unislot wireless receiver (optional accessory) may be
attached here.