97
Chapter 6 Manipulating Clips with Thumbnails
Setting of Clip Meta Data
Information such as the name of the person who shot the
video, the name of the reporter, or the shooting location,
can be read from the SD memory card, and can be
recorded as Clip Meta Data.
•
The camera does not support recording of text memo
data
Reading the SD memory card that
contains the Clip Meta Data (metadata
upload file)
1
Insert the SD memory card that contains the
Clip Meta Data (metadata upload file).
2
Press the THUMBNAIL button.
• The thumbnail screen appears on the LCD
monitor.
NOTE
Press the THUMBNAIL button while pressing DISP/
MODE CHK button when a thumbnail is displayed to
move to step 4.
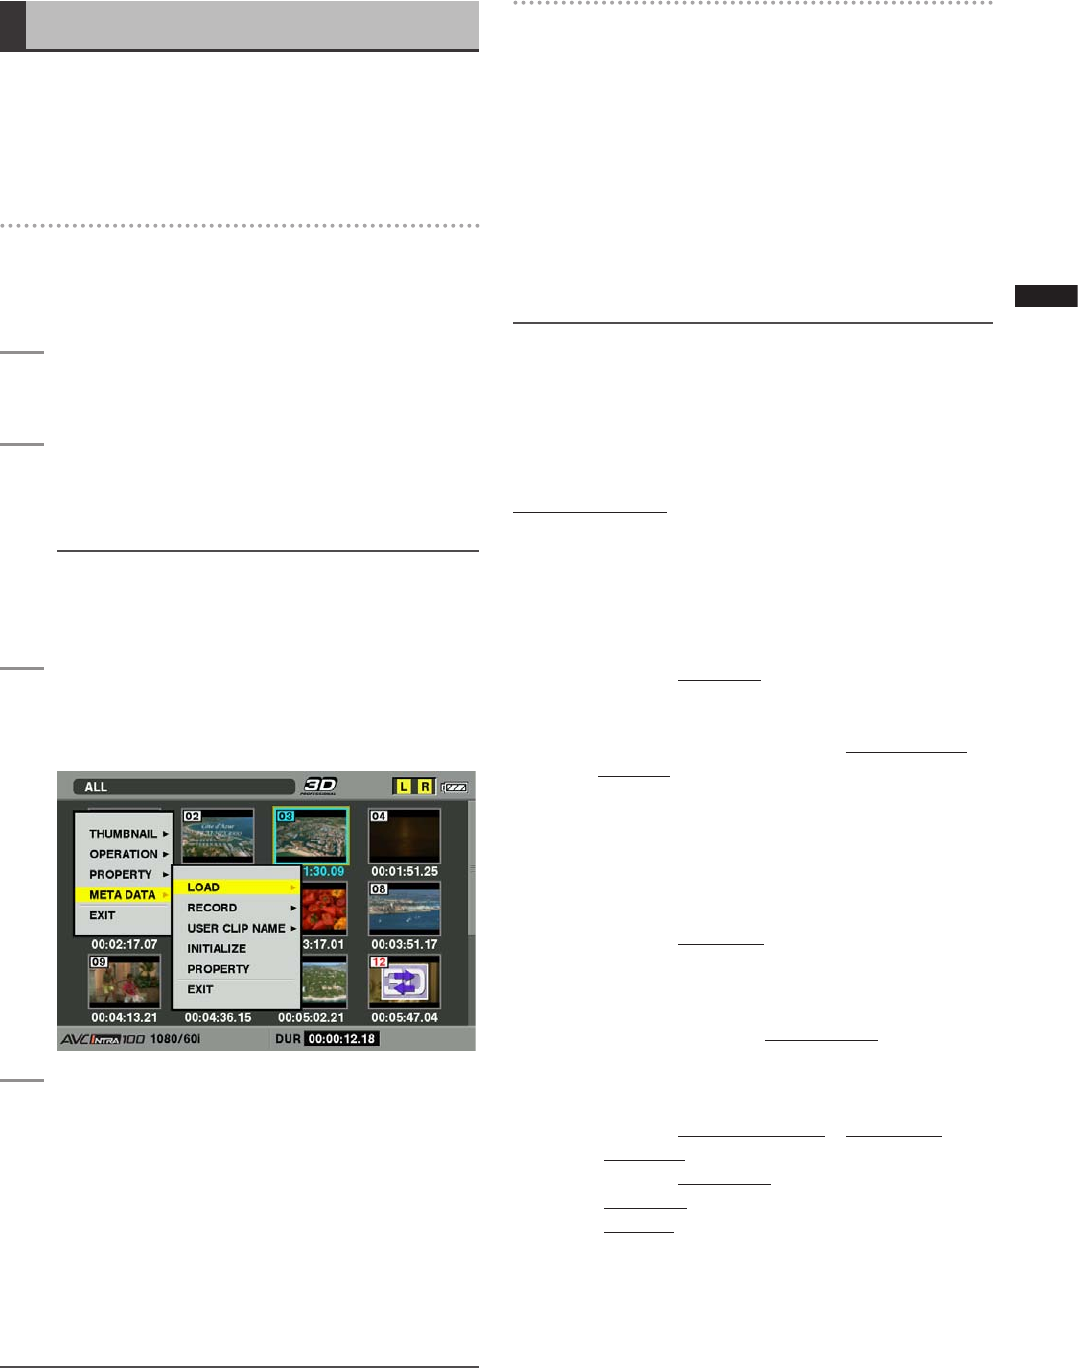
3
Press the MENU button and Select META DATA
LOAD from the thumbnail menu, and press
the SET button.
4
Meta Data names of metadata upload files
stored on the SD memory card are displayed.
Select the desired files using the cursor
buttons, and choose YES.
• Uploading starts.
• Uploaded metadata is retained even if the power
is turned off.
•
For more information on confirmation of uploaded
data, see [Checking and modifying read
metadata] (page
98).
NOTE
Press the cursor button (q) when the Meta Data name is
displayed to change the display to the file name. Press the
cursor button (w) to return to display of the Meta Data name.
Clip Meta Data items
Clip Meta Data includes the following items: Underlined
items can be set by reading the metadata upload file on
the SD memory card. Other items are set automatically
during shooting. Using the latest update version of P2
Viewer, metadata upload files can be written to SD memory
cards using a PC. Download the latest update version of P2
Viewer from the support desk at the following website, and
install it on your PC.
http://pro-av.panasonic.net/
Regarding SD memory cards to be used, see [SD memory
car
d precautions] (page 22).
NOTE
Files edited using software other than P2 Viewer are displayed
as “UNKNOWN DATA!”, and may not be read.
GLOBAL CLIP ID:
Displays the global clip ID, which indicates the
shooting status of the clip.
USER CLIP NAME:
Displays the clip name specified by the user.
*
1
VIDEO: Displays [FRAME RATE] (frame rate of the clip),
[PULL DOWN], and [ASPECT RATIO].
AUDIO: [SAMPLING RA
TE] (sampling frequency of
recorded sound) and [BITS PER SAMPLE]
(digitized bit[s] of recorded sound).
ACCESS: Displays [CREATOR] (person who recorded the
clip), [CREATION DATE] (date when the clip was
recorded), [LAST UPDATE DATE] (date of the
latest update of the clip), and [LAST UPDATE
PERSON] (person who made the latest update of
the clip).
DEVICE: Displays [MANUF
ACTURER] (name of the
device manufacturer), [SERIAL NO.] (serial
number of the device) and [MODEL NAME]
(model name of the device).
SHOOT
*
2
:
Displays [SHOOTER] (name of the person who
shot the video), [START DATE] (start date of
shooting), [END DATE] (end date of shooting),
and [LOCATION] ALTITUDE/LONGITUDE/
LATITUDE/SOURCE/PLACE NAME (altitude,
longitude, latitude, and source of the information
and name of the location).
SCENARIO:
Displays [PROGRAM NAME], [SCENE NO.], and
[TAKE NO.].
NEWS: Displays [REPORTER] (name of the reporter),
[PURPOSE] (purpose of shooting), and
[OBJECT] (object of shooting).
*
1
The USER CLIP NAME recording method is selectable.
For details, refer to [Selecting the USER CLIP NAME
r
ecording method] (page 99).
*
2
During recording, the camera does not automatically set
altitude, latitude and longitude of the shoot.
Such data can be set in the property of a recorded clip.


