


27
Chapter 2 Parts and their Functions
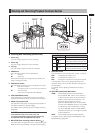
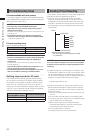
Viewfinder
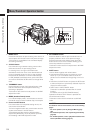
An HD viewfinder can be used with this unit. It is recommended to use the optional AJ-CVF100G (59.94/50Hz switching) or
AJ-HVF21KG.
For details on attachment and adjustments of the viewfinder, refer to the operating instructions of the viewfinder.
AJ-CVF100G
ON
OFF
PEAKING CONTRAST BRIGHT
CHROMA
16
5 6 7 8
2 3 4
12
10 15 9 17 1 11 13 14
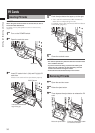
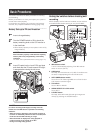
1 Viewfinder (optional)
The viewfinder displays the video image in color or
monochrome during recording or playback. It also
displays warnings and messages – indicating camera
operating status and settings – zebra patterns and
markers (safety zone and center markers, etc.).
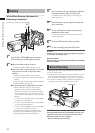
2
CHROMA switch
Switches the display of images between color and
monochrome on the viewfinder.
ON: Displays color images.
OFF: Displays monochr
ome images.
3 ZEBRA switch
Switches a zebra pattern inside the viewfinder.
ON: Displays a zebra patter
n.
OFF: No zebra patter
n is displayed.
The details of the display, such as the type of zebra
pattern, can be set in the DISPLAY SETUP screen.
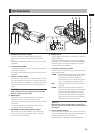
4
TALLY switch
Controls the front tally lamp.
HIGH: Makes the fr
ont tally lamp brighter.
OFF: T
urns the front tally lamp off.
LOW: Makes the fr
ont tally lamp dimmer.
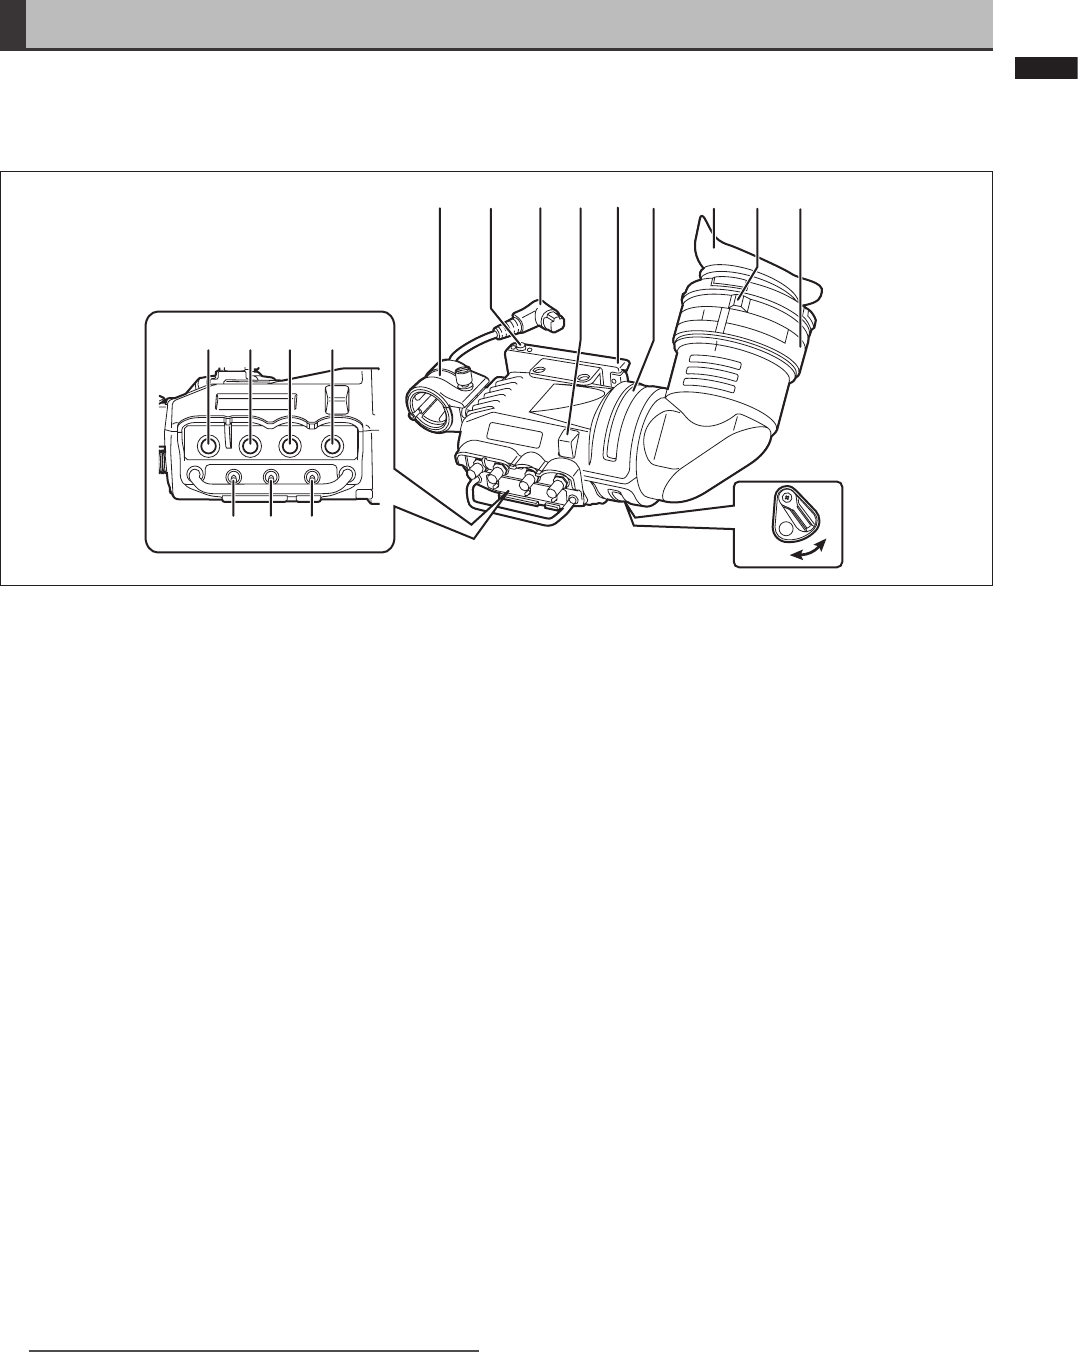
5 PEAKING control
Adjusts the outlines of the images in the viewfinder to
make focusing easier. The setting of this control has no
effect on the output signal of the camera.
6
CHROMA control
Adjusts the chroma of the color for the image in the
viewfinder. The setting of this control has no effect on
the output signal of the camera.
NOTE
In a low temperature environment, the colors in the
displayed image may be paler immediately after switching
on the power.
7 CONTRAST control
Adjusts the contrast of the screen inside the viewfinder.
The setting of this control has no effect on the output
signal of the camera.
8
BRIGHT (brightness) control
Adjusts the brightness of the screen inside the
viewfinder. The setting of this control has no effect on
the output signal of the camera.
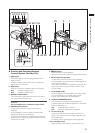
9
Front tally lamp
Lights when the camera is shooting if the TALLY switch
is set to HIGH or LOW.
Also, the lamp flashes on and off as a warning
indication, in the same manner as the REC lamp inside
the viewfinder.
The setting of the TALLY switch determines the
brightness of the front tally lamp (HIGH or LOW).
10
Viewfinder stopper
This is used to attach/detach the viewfinder.
11
Eyepiece
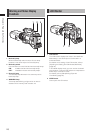
12 Back tally lamp
Lights when the camera is shooting. Also, the lamp
flashes on and off as a warning indication, in the same
manner as the REC lamp inside the viewfinder.
The back tally lamp is hidden when the lever is in the
OFF position.
13
Diopter adjuster ring
Adjust this control to match the vision of the person
using the camera so that the image on the screen in the
viewfinder is as clear as possible.
14
Lock ring
15 Connection plug
16 Microphone holder
17 Slide rail