


29
Setting the Built-in Clock
Chapter 2 Installation and Preparations
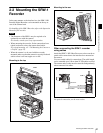
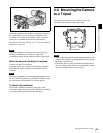
2-9 Setting the Built-in
Clock
When using the camera for the first time, set the built-in
clock to the local time, using the <DATE> page of the
MAINTENANCE menu displayed on the viewfinder
screen.
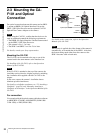
To set the menu on monitor screen, connect a monitor to
either of the MONITOR OUT HD SDI connectors.
Setting procedure
1
Turn on the camera.
2
While holding the MENU SEL/ENTER dial pressed,
press the VF MENU/DISPLAY button.
The camera enters Menu Operation mode, and “TOP”
is displayed at the upper-right corner of the screen.
3
Rotate the MENU SEL/ENTER dial to set the pointer
to “TOP” and push on the MENU SEL/ENTER dial.
The TOP MENU screen is displayed.
4
Rotate the MENU SEL/ENTER dial to position the
pointer to MAINTENANCE and push on the MENU
SEL/ENTER dial.
The CONTENTS page of the MAINTENANCE menu
is displayed.
(The following display examples are those in Custom
mode. They include some items not displayed in Cine
mode.)
5
Turn the MENU SEL/ENTER dial to scroll the page
and position the pointer to <DATE>.
6
Push on the MENU SEL/ENTER dial.
The <DATE> page is displayed.
7
Turn the MENU SEL/ENTER dial and set the date and
time.
Push on the MENU SEL/ENTER dial to shift to the
next digit.
8
When the date/time setting is completed, press the VF
MENU/DISPLAY button to exit Menu Operation
mode.
For details on menu operations, see “4-2 Basic Menu
Operations” (page 64).
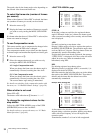
<TOP MENU>
B
USER
USER MENU CUSTOMIZE
ALL
z
OPERATION
z
PAINT
z
MAINTENANCE
z
NETWORK
z
FILE
z
DIAGNOSIS
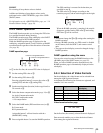
CONTENTS M00
xx
B
01.<BASE SETTING>
02.<AUTO SETUP>
03.<WHITE SHADING>
04.<BLACK SHADING>
05.<OHB MATRIX>
06.<AUDIO>
07.<OUTPUT FORMAT>
08.<DOWN CONVERTER>
09.<POWER SAVE>
10.<BATTERY ALARM SET>
CONTENTS M00
xx
02.<AUTO SETUP>
03.<WHITE SHADING>
04.<BLACK SHADING>
05.<OHB MATRIX>
06.<AUDIO>
07.<OUTPUT FORMAT>
08.<DOWN CONVERTER>
09.<POWER SAVE>
10.<BATTERY ALARM SET>
B
11.<DATE>
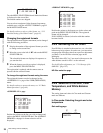
<DATE> M12 TOP
DATE/TIME
x
2008/3/22 16:53