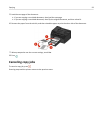
6 From the Sides menu in Scan Options, select 1‑Sided or 2‑Sided, and then touch Accept.
7
Press .
Follow the instructions on the display. The scan is complete when a message appears on the printer control panel
indicating that the file you scanned has been saved.
Scanning photos
For Windows users
1 Load the photo or photos facedown on the scanner glass.
2
Click or Start.
3
Click All Programs or Programs, and then select the printer program folder from the list.
4 Navigate to:
Printer Home > select your printer > Scan > Advanced scan
5 From the Scan Source list, select Flatbed.
6 From the Scan Settings tab, select the appropriate settings:
a Set Resolution (dpi) to 150 dpi or more.
b Set Color Depth to Color.
c Set Content Type to Photo.
d From the Original Types list, select the item that best describes your original photo.
• For example, if you are scanning a glossy photo printed on your inkjet printer, then select Inkjet Glossy.
• If you are scanning a glossy photo purchased from a photo print service, then select Retail Photo.
7 Click Scan, and then follow the instructions on the computer screen.
8
When the scan is complete, save the photo or photos as JPEG(*.JPG).
For Macintosh users
1
Load the photo or photos facedown on the scanner glass.
2
From the Applications folder in the Finder, launch Image Capture.
3
From the list of devices, select your printer.
Note:
If your printer name is not present in the list of devices, then you need to create a print queue for your
printer. For more information, see the documentation that came with your operating system.
4
Adjust the scan settings as follows:
a Set Kind to Color.
b Set Resolution to 150 dpi or more.
c Set Format to JPEG.
Scanning 63


