


Installing options 55
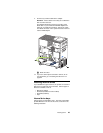
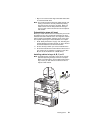
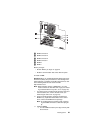
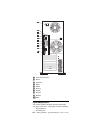
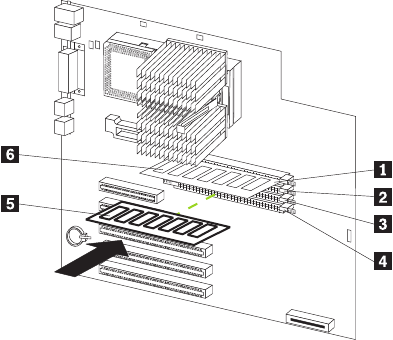
1 DIMM connector 4
2 DIMM connector 3
3 DIMM connector 2
4 DIMM connector 1
5 DIMM 2
6 DIMM 1
Before you begin:
• Review “Before you begin” on page 43.
• Read the documentation that comes with the option.
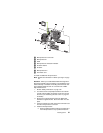
To install a DIMM:
Attention: When you handle Electrostatic Discharge-Sensi-
tive devices (ESD), take precautions to avoid damage from
static electricity. For details on handling these devices, refer
to the following Web site and search for ESD:
http://www.ibm.com
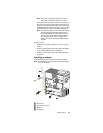
Note: When installing memory in DIMM slot 4, you may
need to remove the hard disk drive cage (see “Install-
ing a hard disk drive in bays E, F, or G” on page 53).
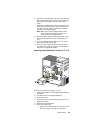
1. Turn off the server and disconnect all power cords and
external cables; then, remove the side cover (see
“Removing the side cover” on page 44).
2. Touch the static-protective package containing the
DIMM to any unpainted metal surface on the server.
Then, remove the DIMM from the package.
Note: To avoid breaking the retaining clips or damag-
ing the DIMM connectors, handle the clips gen-
tly.
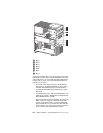
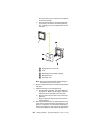
3. Install the DIMM:
a. Turn the DIMM so that the pins align correctly with
the connector.