


1-8 A-61588 July 2008
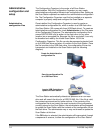
Unpacking and
setting up the Scan
Station
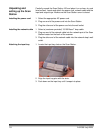
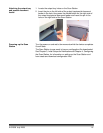
Carefully unpack the Scan Station 100 and place it on a clean, dry and
level surface. Locate and attach the power cord, network cable and the
input and output trays. Make sure the Scan Station cover is closed.
Installing the power cord 1. Select the appropriate AC power cord.
2. Plug one end of the power cord into the Scan Station.
3. Plug the other end of the power cord into the wall outlet.
Installing the network cable 1. Select a (customer provided) 10/100 Base T drop cable.
2. Plug one end of the network cable into the network port of the Scan
Station located on the back of the scanner.
3. Plug the other end of the network cable into the network drop’s wall
outlet.
Attaching the input tray 1. Locate the input tray slots on the Scan Station.
2. Align the input tray pins with the slots.
3. Push down on the input tray until it snaps into place.