


A-61588 July 2008 4-25
Configuring FTP
destinations
FTP destinations require a slightly different configuration than the other
destinations. The Configuration Organizer allows you to configure both
FTP and proxy server settings. Depending on your network
configuration you may or may not have to communicate with FTP sites
through a proxy server. For each FTP destination you can specify
individual username and password settings. This is important as you
may be communicating with FTP sites located at different companies or
on different company servers.
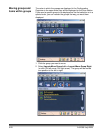
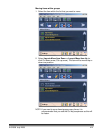
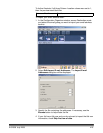
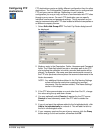
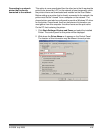
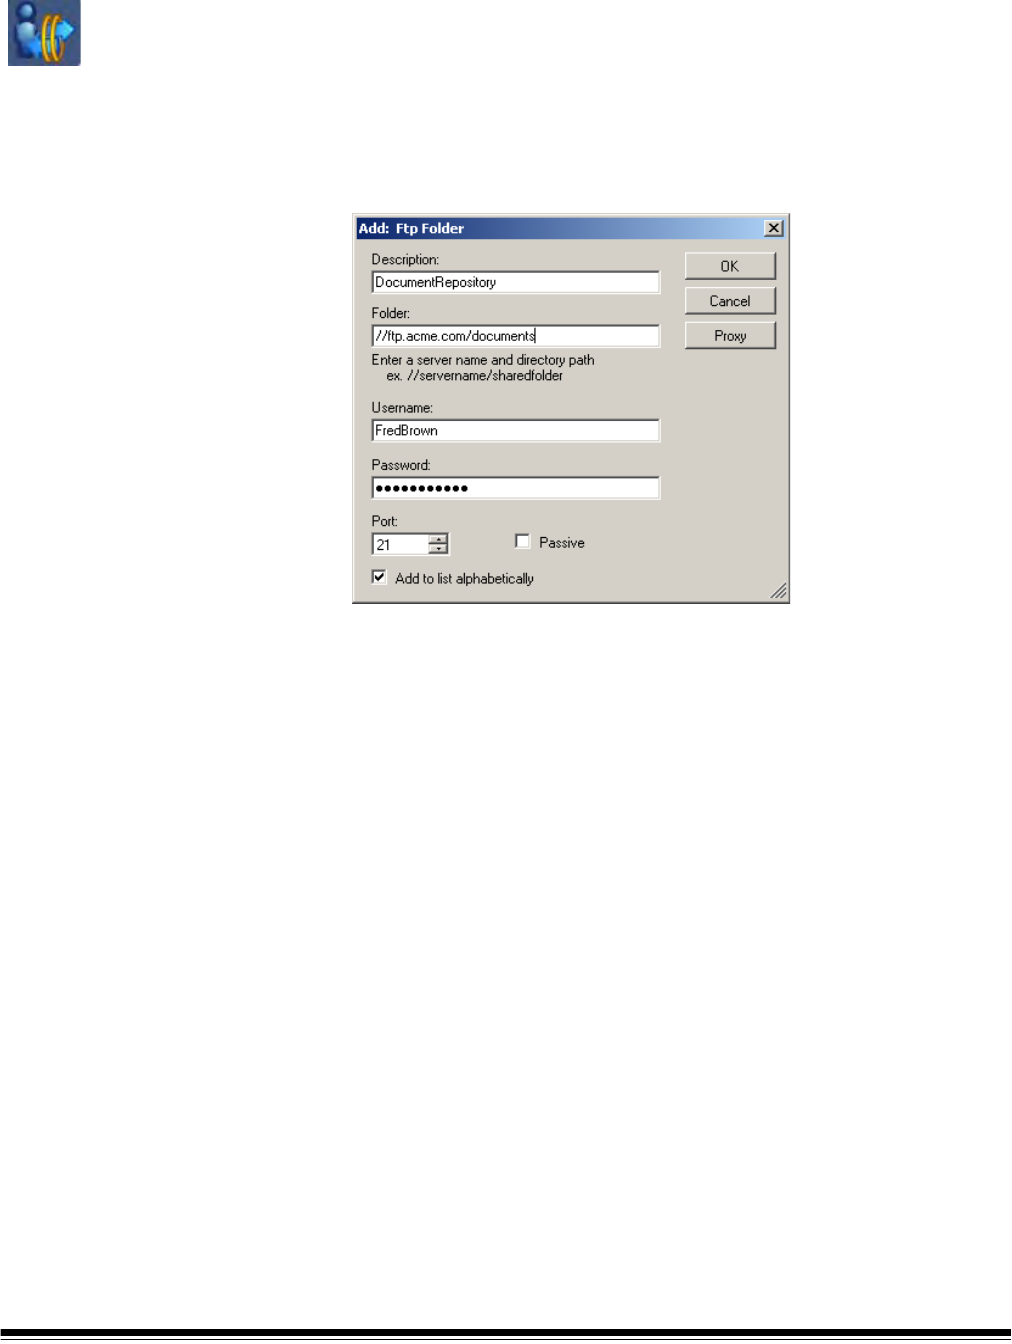
1. Select Edit>Add Group>FTP. The Add: Ftp Folder dialog box will
be displayed.
2. Make an entry in the Description, Folder, Username and Password
fields. The Folder field should contain a complete path to the FTP
site including the subfolder into which scanned documents will be
placed. For example, //ftp.acme.com/documents would connect to
the FTP site ftp.acme.com and place the scanned documents in the
folder documents.
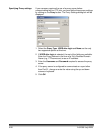
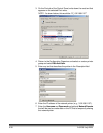
NOTE: Any additional folders defined in the File Naming Settings
screen will also be used when creating the scanned
documents. See the section entitled, “File Name Settings”
earlier in this chapter.
3. If the FTP site communicates on a port other than Port 21, change
the value using the up and down arrows.
4. You may optionally select Passive if required by the FTP server.
Passive is most commonly used if the FTP site is outside the
firewall.
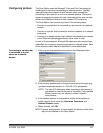
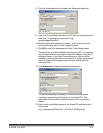
5. If you do not want the address added to the list alphabetically, click
Add to list alphabetically to uncheck it. This will add the item to
the list in chronological order.
6. If your company requires the use of proxy servers, click the Proxy
button and go to the next section; otherwise click OK.