


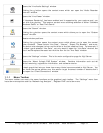
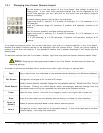
Opens the “Live Audio Settings” window.
Clicking the
button opens the context menu which can open the “Audio Recorder
Controls” window.
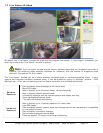
Opens the “Live Viewer” window.
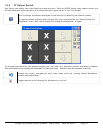
If “Hardware Rendering” has been enabled and is supported by your capture card, you
can click the
button. This opens a context menu allowing selection of either “Software
Rendered Cams” or “Real Time Cams”.
Opens the “Search” window.
Clicking the
button opens the context menu which allows you to open the “Custom
Search” window.
Resets window positions.
Clicking the
button opens the context menu which allows you to open the several
other windows. These include “Live Data”, “Alarms”, “Export File Browser”, and more.
The button also changes its icon and function to the last used tool item. For example, if
I clicked
and selected “Live Data”, not only would it open the “Live Data” window, but
also it would replace the reset icon with the icon for the “Live Data” window.
Opens the “Settings” window. This is the main configuration page for Vigil Server.
Opens the “About 3xLogic DVR System” window. Contains information such as trial
period remaining, registration information, and software version.
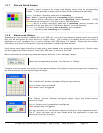
A basic graph that lets you know how many clients have connected to Vigil Server. You
can hover the mouse pointer over this section to get the exact number or double-click it
and open the “Client Connections” window.
Menu Toolbar 1.1.1
The menu toolbar has nearly the same functions as the graphical main toolbar. The “Settings” menu item
has a few more options such as “Network Log Analyzer”, “Register DVR” and a few more.
3xLogic Vigil System Server Software - User’s Guide Doc# 08100610 Page 13