


7-8
User Guide for Cisco Show and Share 5.3.x
Chapter 7 Create, Add, and Manage Videos
Procedures
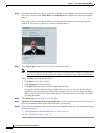
Step 2 Enter a title for your video in the Title field.
This title identifies the video and any supplemental or downloadable files—such as slides or a text
transcript—that you might later package together with it.
Step 3 (Optional) Enter a description for your video in the Description field.
The description you enter appears on the Info tab of your video on the Video Playback page. The
Description field supports a small subset of HTML that you can use to format the text. See HTML
Supported by the Description Field, page 7-12, for more information.
Step 4 (Optional) Enter tags for your video in the Tags field. You can enter more than one tag for your video.
Separate multiple tags with a space.
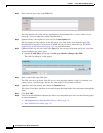
a. Expand the Add Video drawer and click link your video by adding a video URL.
The fields for linking to a URL appear.
Step 5 Enter a video URL in the URL field.
This URL must be to an actual video file, not to a web page that contains a video. For example, you
cannot point to a YouTube page and have the video appear in Cisco Show and Share.
Step 6 (Optional) Add a duration for the video in the Duration field.
This allows Cisco Show and Share to accurately display the length of the video and progress through the
video.
Step 7 Click Save URL.
Step 8 Now you can add additional content to the video or save and publish your video. See the following topics
for more information:
• Add Supplemental or Downloadable Files to a Video, page 7-9
• Save or Publish Your Video, page 7-11