


8-7
User Guide for Cisco Show and Share 5.3.x
Chapter 8 Live Events
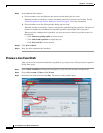
Procedures
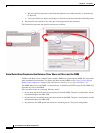
Step 3 In the Choose a Live Event Type field, click DME Live Event.
Step 4 Enter a name and description for the live event. Enter tags (optional) that describe the live event.
Step 5 Choose an encoder from the drop-down Encoder list. (The available encoders are managed by the system
administrator.)
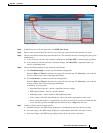
a. If you choose an encoder with a default configuration, the Video URL is automatically populated.
b. If you choose an encoder and enter Advanced settings, the Video URL is populated when you
choose a publishing mode.
Step 6 Choose the Default Settings or the Advanced radio button:
a. Click Default Settings to use the encoder default configuration.
Enter the Date and Time for when the live event will start and stop. Click Forever if you want the
event to remain in the video listing page indefinitely.
b. Click Advanced to customize the encoder configuration.
Enter the Date and Time for when the live event will start and stop. Click Forever if you want the
event to remain in the video listing page indefinitely.
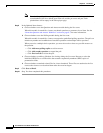
In addition, you can specify:
–
Encoding format (preset)—choose a predefined encoder setting.
–
DME Input Channel—choose a specific channel.
–
Publishing mode—choose a Push or Pull publishing mode.
–
Video, Audio, and Video Input Standard—choose the modes appropriate for the event.
–
Store as file (auto archive)—automatically save the live event file to convert to a VOD after the
event. The file type must be .wmv and the event must have a Stop time and date.
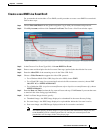
Step 7 In the Live Event Images drawer, specify:
a. Thumbnail image—the JPEG image displayed as a thumbnail in the event directory listing.
b. Pre-event image—the JPEG image displayed as a placeholder before the live event is active.
c. Post-event image—the JPEG image displayed after the live event has concluded.