


1-25
DXC-D30WS/P(E)/V1
Chapter 2 Fitting and Connections
36
Chapter 2 Fitting and Connections
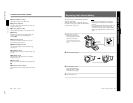
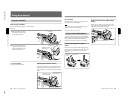
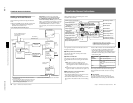
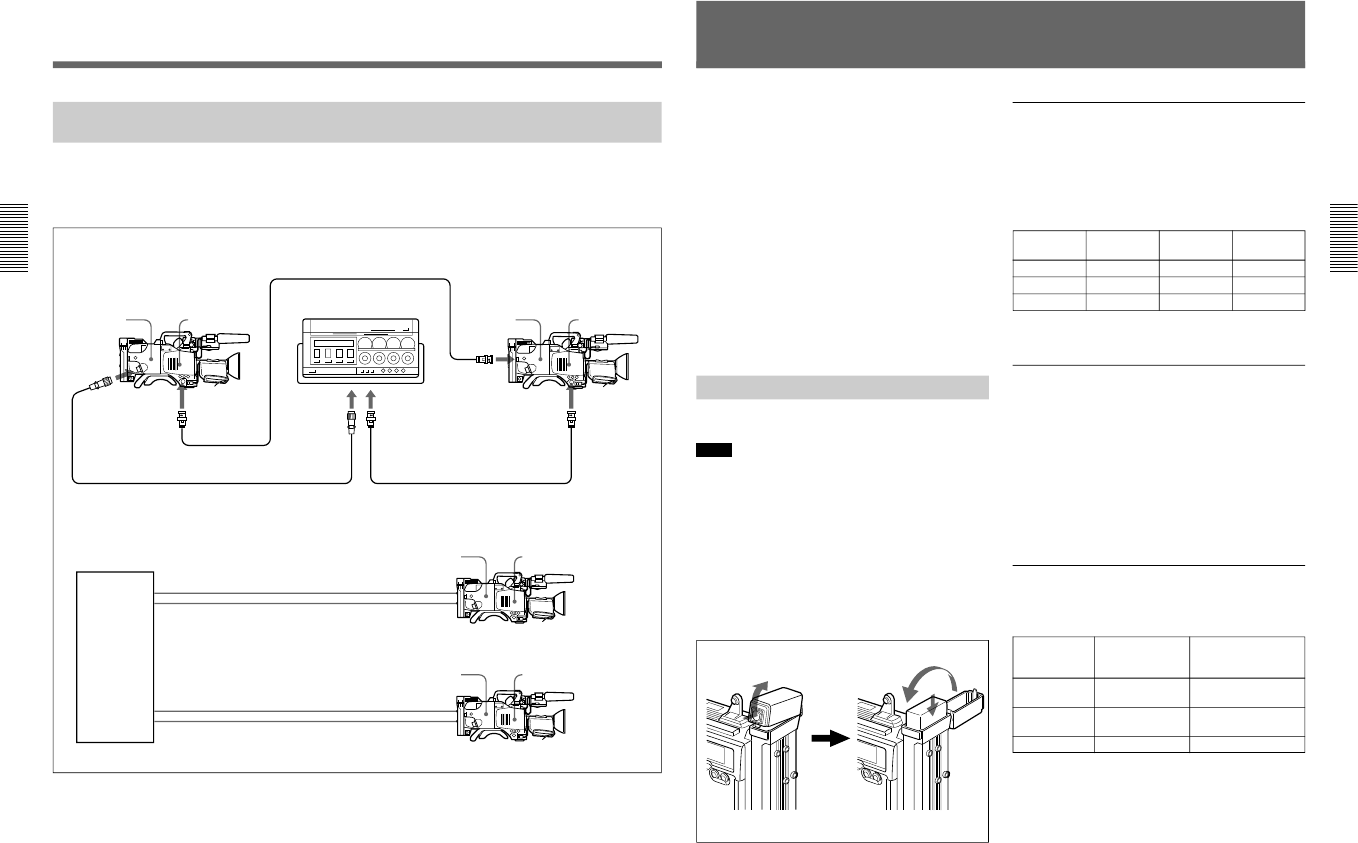
Connecting a Number of Cameras (Without Using a Camera Control
Unit)
When using two or more synchronized cameras
without a camera control unit, connect an external sync
signal to the GEN LOCK IN connector on the camera
adaptor (CA-537/537P etc.), supplying a VBS or BS
signal. The camera will then operate synchronized to
this signal.
You can adjust the synchronization using the basic
menus. (See page 53.)
VTR/CCU/CMA
VIDEO OUT VIDEO OUT
GEN LOCK IN
VIDEO OUT
GEN LOCK IN
VIDEO OUT
GEN LOCK IN
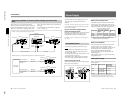
Example 1: Camera 2 synchronized to the signal from camera 1
CA-537/537P
Camera 1
DXC-D30/D30P
CCZ-A Camera Cable
BNC cable
Portable VTR
To camera
connector
To video input
connector
CA-537/537P
Camera 2
DXC-D30/D30P
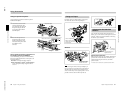
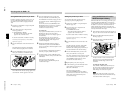
Example 2: Cameras 1 and 2 synchronized to the signal from a special effects unit or similar
Special effects
unit or similar
Video input connector
BNC cable
Sync signal output
connector
CA-537/537P
DXC-D30/D30P
BNC cable
Video input connector BNC cable
CA-537/537P
Camera 2
Camera 1
DXC-D30/D30P
Sync signal output
connector
BNC cable
Connections
BNC cable
Chapter 2 Fitting and Connections
Chapter 2 Fitting and Connections
37
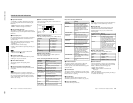
Power Supply
This unit operates on either a battery pack or an AC
supply (using the optional CMA-8A/8ACE AC
Adaptor).
For details of the power supplies which can be used, refer to
the documentation supplied with the VTR connected to this
unit or the camera adaptor.
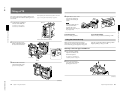
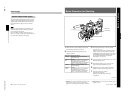
Using an Anton Bauer Intelligent Battery
System and Ultralight System
Fitting the special battery mount made by Anton Bauer
Corporation to this unit allows you to use their
Intelligent Battery System and Ultralight System.
For details, consult your Anton Bauer products supplier or
Sony dealer.
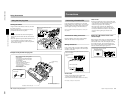
Using Battery Packs
Always fully charge a battery pack before using it.
Notes
•Be careful that other metal objects do not come in
contact with the metal parts of the battery pack, as
this could cause a short.
•Do not leave the battery pack in the camera if it is not
going to be used for a long time.
•If the battery pack is recharged after use while still
hot, it may not be possible to obtain a full charge.
Fitting a battery pack (NP-1B)
Open the lid of the battery case, insert a fully-charged
battery pack, and close the lid.
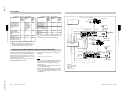
Battery pack operating times
The following table shows approximate continuous
operating times, when operating the camera and 1.5-
inch viewfinder at normal temperatures, with a camera
adaptor and an DSR-1/1P or PVV-3/3P connected.
Approximate operating times with
a fully-charged battery pack
a) Requires the special-purpose DC-500 Battery Case.
Cannot be used with a camera adaptor.
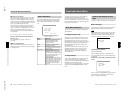
Battery low indications
When the voltage of the supply to the camera head
lowers to or below 11.0 V, the battery voltage
indication appears in the viewfinder. At this time, the
BATT indicator in the viewfinder flashes when
operating with the DSR-1/1P or PVV-3/3P.
If you continue using the camera head, the BATT
indicator lights up.
When the battery pack is low, replace it with a fully-
charged battery pack.
Battery pack charging
Before using a battery pack, charge it as shown in the
following table.
For details of battery charger operation, refer to the
instructions provided with the battery charger to be used.
Press and lift
Battery case
NP-1B Battery
Pack
With DSR-1/
1P
With camera
adaptor
Battery pack With PVV-3/
3P
NP-1B 110 minutes 60 minutes 60 minutes
NP-1A 85 minutes 45 minutes 50 minutes
BP-90A
a)
— 130 minutes 140 minutes
Approximate
charging time
(normal temperature)
Battery chargerBattery pack
NP-1A BC-1WD/1WDCE,
BC-410/410CE
70 minutes
NP-1B BC-1WD/1WDCE,
BC-410/410CE
95 minutes
BP-90A BC-410/410CE 160 minutes