


2-3
DXC-D30WS/P(E)/V1
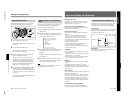
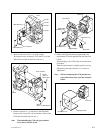
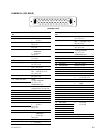
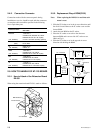
5. Remove setscrew (3 × 4) and remove the filter knob.
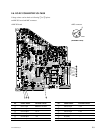
Remove four screws (B3 × 8) and washers. Remove the
CCD unit from the Front unit Ass’y.
Note: When handling the CCD unit, pay attention
not to stress each PA board.
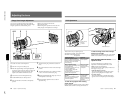
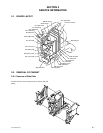
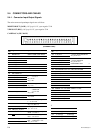
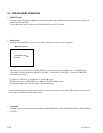
4. Remove four screws (B3 × 10 : with washer).
Disconnect the two connectors, CN2 and CN14 on the
MB-785 board. Pull out the Front unit Ass’y.
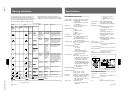
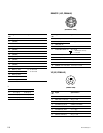
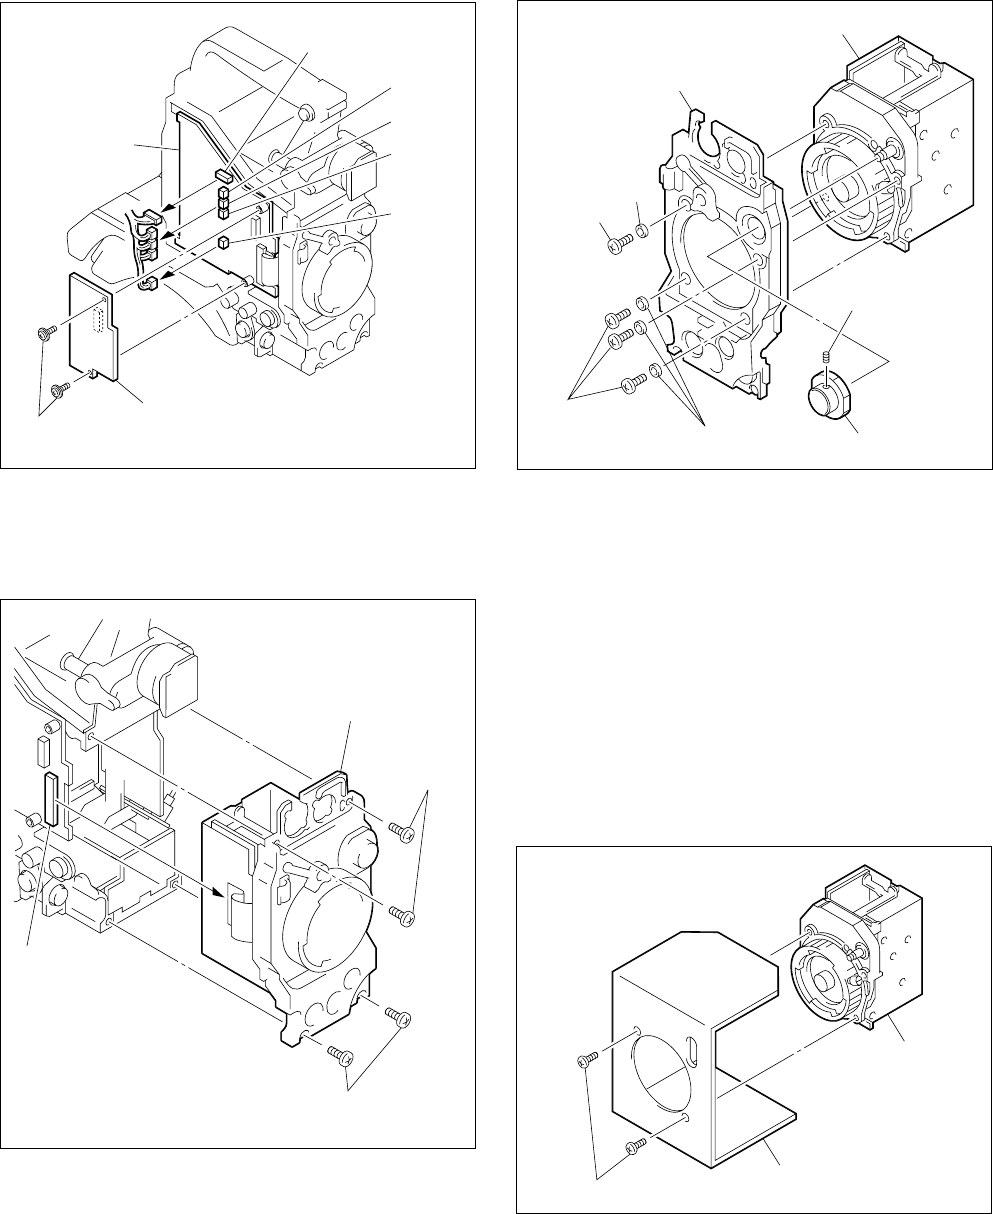
6. Remove the CCD unit from transport holder for
replacement CCD unit supplied from the Sony Part
Center.
When installing a new CCD unit, reverse the above
procedures.
After the replacement is complete, perform several
adjustments referring to Section 3-1-4.“Note on
Adjustment”.
Note: When transporting the CCD unit that was
removed from the unit, reuse the transport
holder.
Washer(W3)
Screws(B3 X 8)
Washers(W3)
Screw(B3 X 8)
Setscrew(3 X 4)
Front panel
Filter knob
CCD unit
CCD unit
Transport holder
Screws(P3 X 6)
Front unit Ass'y
Screws
(B3 X 10:
with washer)
Screws
(B3 X 10: with washer)
CN103
CN105
CN106
CN107
CN123
CN2
MB-785 board
AT-125 board
Screws(B3 X 4)