


1-45
DXC-D30WS/P(E)/V1
76
Chapter 5 Adjustments and Settings
Chapter 5 Adjustments and Settings
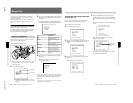
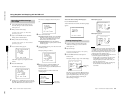
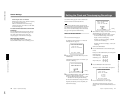
When using the clear scan function
Watching the monitor screen, adjust the frequency
to give minimum interference.
If there is a black band in the monitor image,
reduce the frequency, and if there is a white band,
increase the frequency.
To return from the basic menu to the normal
indications
Press the MENU/STATUS switch as many times as
necessary until the normal indications appear. The
new setting of the shutter speed or clear scan
frequency appears in the normal screen display.
When shooting is finished
Set the SHUTTER switch to the OFF position.
The SHUTTER indicator in the viewfinder goes off.
Shutter Settings
Chapter 5 Adjustments and Settings
77
Chapter 5 Adjustments and Settings
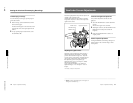
Setting the Clock and Timestamping Recordings
Use advanced menu page 8 to set the camera head’s
internal clock and record the date and time.
Note
If the following date/time setting procedure for the
internal clock does not cause the date/time information
to be displayed in advanced menu page 8, it may be
due to a worn-out lithium battery in the camera head.
See page 21 and replace the lithium battery.
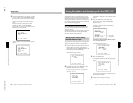
How to set the date and time
1
Access advanced menu page 8.
For details of menu operations, see “Advanced
Menu Operations” (page 57).
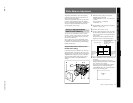
PAGE 8(NEXTm$ PREVm4)
CLOCK IND:OFF
mCLOCK SET:(STARTm4)
EXIT MENU (YESm4)
2
Move the cursor to CLOCK SET, then press the
UP/ON button.
The following display appears, in which the year
indication is flashing.
PAGE 8(NEXTm$ PREVm4)
CLOCK IND:OFF
CLOCK SET:(STARTm4)
YY MM DD
96 10 27
6:49 PM
EXIT MENU (YESm4)
3
Press the MENU/STATUS switch and the UP/ON
button to set the desired date and time.
1) Press the MENU/STATUS switch up or down
until the item to be changed starts flashing.
2) Press the UP/ON button to change the number.
Repeat 1) and 2) until you have completed your
date and time settings.
PAGE 8(NEXTm$ PREVm4)
CLOCK IND:OFF
CLOCK SET:(STARTm4)
YY MM DD
96 10 28
6:55 PM
EXIT MENU (YESm4)
4
Select whether to display a 12-hour clock (showing
AM and PM hours) or a 24-hour clock.
1) Press the MENU/STATUS switch up or down
to select the desired setting (12-hour clock
display or 24-hour clock display).
Example of 12-hour clock display: 6:49 PM
(“6” and “PM” are flashing)
Example of 24-hour clock display: 18:49 (“18”
is flashing)
2) Press the UP/ON button.
5
Press the UP/ON button to select the date display
format.
Each press of the UP/ON button cycles through the
following options.
•Year-month-day: YY MM DD
96 10 27
•Month-day-year: MM DD YY
10 27 96
•Day-month-year: DD MM YY
27 10 96
6
Press the MENU/STATUS switch down.
The cursor is shown at the CLOCK SET position.
PAGE 8(NEXTm$ PREVm4)
CLOCK IND:OFF
mCLOCK SET:(ENDm4)
YY MM DD
96 10 28
6:55 PM
EXIT MENU (YESm4)
7
Press the UP/ON button (to a time signal).
The clock starts from 00 seconds. The clock
display can be viewed if CLOCK IND has been set
to ON.
Flashing
Flashing