


1-35
DXC-D30WS/P(E)/V1
56
Chapter 4 Viewfinder Screen Indications and Menus
Chapter 4 Viewfinder Screen Indications and Menus
Viewfinder Basic Menu
2
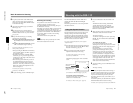
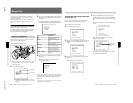
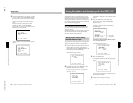
Press the UP/ON button once.
The title is superimposed to the picture displayed
on the viewfinder screen.
3
Start shooting.
4
To stop the title recording, press the MENU/
STATUS switch to clear the title display.
Note on using the CCU-M5/M5P Camera Control Unit
When the CCU-M5/M5P has a function switch setting
of “TITLE ON”, the title display takes precedence, and
the status display (see page 48) do not appear in the
normal incidations. However, when you press the
MENU/STATUS switch up, for as long as you hold it
up the status indications appear in place of the title.
Chapter 4 Viewfinder Screen Indications and Menus
57
Chapter 4 Viewfinder Screen Indications and Menus
Viewfinder Advanced Menu
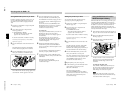
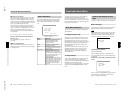
Bring up the advanced menu pages by setting the
POWER switch to ON while pressing the UP/ON
button up (see page 46).
There are up to 14 advanced menu pages (the number
displayed depends on the switch settings and the type
of connected VTR).
Note on using the CCU-M5/M5P Camera Control Unit
When the camera head is in EZ mode, the advanced
menu may not appear. Release the EZ mode
beforehand. (See page 12.)
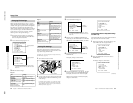
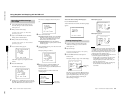
Advanced Menu Operations
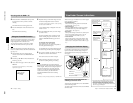
To change the page
Move the cursor to the menu number, then press the
UP/ON button or the DOWN/OFF button.
Pressing the UP/ON button displays the previous page
and pressing the DOWN/OFF button displays the next
page. Pressing the DOWN/OFF button when the last
page is being displayed returns the display to the first
page.
To select items in a page
Press the MENU/STATUS switch to move the cursor
among the menu items.
To change settings
This operation is the same as for the basic menus.
For a description of basic menu operations, see page 51.
To return to the normal indications
Move the cursor to EXIT MENU, then press the UP/
ON button.
Contents and Settings of Each
Page
Each page’s contents and settings are described below.
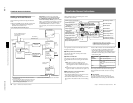
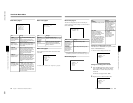
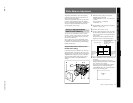
Advanced menu page 1
Use this page to return all advanced menu settings to
their factory preset values.
For details of this operation, see “Displaying the advanced
menu and switching to the normal indications” (page 46).
PAGE 1(NEXTm$ PREVm4)
mALL RESET
(YESm4)
EXIT MENU (YESm4)
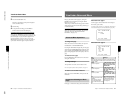
Advanced menu page 2
PAGE 2(NEXTm$ PREVm4)
GAIN
mHIGH:18dB
MID: 9dB
LOW: OdB
DL:ON
EXIT MENU (YESm4)
Item
Settings
GAIN
This sets gain values for the positions of the GAIN switch.
The HIGH, MID, and LOW values must be set so that LOW
< MID < HIGH.
HIGH
Sets the H position.
3 dB, 6 dB, 9 dB, 12 dB, 18
dB (normal value), 18 dB +
DPR, 24 dB, 24 dB + DPR,
HYPER GAIN
MID
Sets the M position.
0 dB, 3 dB, 6 dB, 9 dB
(normal value), 12 dB, 18
dB, 18 dB + DPR, 24 dB, 24
dB + DPR
LOW
Sets the L position.
–3 dB, 0 dB (normal
value), 3 dB, 6 dB, 9 dB, 12
dB, 18 dB, 18 dB + DPR, 24
dB
DL
Sets DynaLatitude function
ON/OFF.
This setting is valid only
when the OUTPUT/DL/
DCC+ switch has been set to
DL.
ON (normal value), OFF
When set to ON, the amount
of DynaLatitude effects is
set in basic menu page 3
(see page 52).