


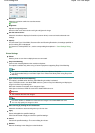


On-Screen Manual
>
Scanning Guide
> MP Navigator EX Screens
> Print Dialog Box
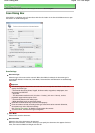
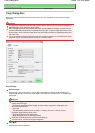
Print Dialog Box
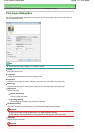
Click Print on the Custom Scan with One-click tab or in the One-click Mode screen to open the Print
dialog box.
Important
This procedure requires the machine and a printer. Refer to the manual of your printer to prepare it.
You can print with the Print function only when the machine and printer are connected to the same
computer. Images may not be printed correctly on a network printer.
When multiple documents are placed on the Platen and Auto Mode is selected, each document is
scanned individually and printed on a separate sheet of paper. To print multiple documents on one
sheet of paper, select a document type other than Auto Mode and select a standard document size
(A4, Letter, etc.).
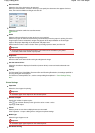
Scan Settings
Document Type
Select the type of document to be scanned. When Auto Mode is selected, the document type is
automatically detected. In that case, Color Mode, Document Size and Resolution are automatically
set as well.
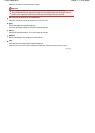
Important
The following types of documents cannot be scanned correctly with Auto Mode. In that case,
specify Document Type.
- Documents other than photos, Hagaki, business cards, magazines, newspapers, text
documents and CD/DVD
- A4 photos
- Text documents smaller than 2L (5 inches x 7 inches) (127 mm x 178 mm), such as
paperback pages with the spine cut off
- Documents printed on thin white paper
- Wide documents such as panoramic photos
Reflective CD/DVD labels may not be scanned properly.
To reduce moire, set Document Type to Magazine.
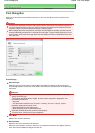
Color Mode
Select how to scan the document.
Document Size
Select the size of the document to be scanned.
When you select Custom, a screen in which you can specify the document size appears. Select a
Units, then enter the Width and Height and click OK.
Sayfa 138 / 268 sayfaPrint Dialog Box