


The calibration process is fully automatic and can be performed unattended after you have loaded paper
of the type you wish to calibrate—which should be A4, Letter or any larger size.
The process takes about 8–10 minutes and consists of the following steps.
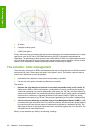
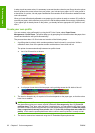
1. A calibration test chart is printed, which contains patches of each ink used in your printer.
2. The chart is allowed to dry for a period of time that depends on the paper type, so that the colors
have time to stabilize.
3. The chart is scanned and measured using the HP Embedded Spectrophotometer.
4. From the measurements made by the spectrophotometer, the printer calculates the necessary
correction factors to apply for consistent color printing on that paper type. It also calculates the
maximum amount of each ink that can be applied to the paper.
TIP: If color calibration fails, check whether a color is missing from the chart. A missing color may be
caused by a printhead problem: see
Troubleshooting ink cartridge and printhead issues on page 137.
NOTE: Matte black is not used on glossy or satin papers, so that column of the chart is not printed
when calibrating those paper types.
Calibration from Photoshop
When you use Adobe Photoshop CS3 (or later version) for Windows, the Print window can warn you if
the paper needs color calibration, and can provide an icon
to launch the HP Printer Utility to perform
the calibration.
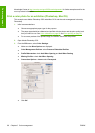
To enable this capability under Windows XP, you must download and install the following free software
packages from Microsoft's Web site:
●
Microsoft Core XML Services (MSXML) 6.0
●
Microsoft XML Paper Specification Essentials Pack 1.0
Color profiling
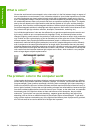
Color calibration provides consistent colors, but consistent colors are not necessarily accurate. For
instance, if your printer prints all colors as black, its colors may be consistent but they are not accurate.
ENWW Color profiling 61
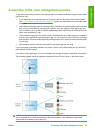
Color management