


115
Editing
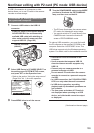
Writing data on a hard disk drive
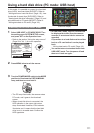
1 Switch the mode to USB HOST.
•
“SwitchingtotheUSBHOSTmode”(Page111)
•
Thethumbnailscreenisdisplayed.
(USBHOSTisdisplayedinthebottomright.)
2 Connect a hard disk drive via USB.
Aharddiskdrivethathasnotbeenformatted
withthecamera-recordermustbeformatted
asdirectedin“Formattingaharddiskdrive”
(Page114).
3 Insert a P2 card.
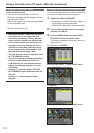
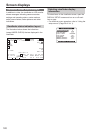
4 Press the MENU button and select HDD →
EXPORT from the thumbnail menu.
SpecifytheslotthatcontainstheP2card
bearingthedatatobewrittentotheharddisk
drive.
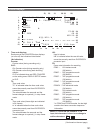
5 Select YES.
•
Thisstartsthewriteprocess.
•
Whenthedataisbeingwritten,aprogress
barisdisplayed.Todiscontinuewriting,
presstheSETbuttonontheOperationlever
insteadofcancellationconrmation.
•
Whenthewritingiscompleted,themessage
“COPYCOMPLETED!”isdisplayed.
•
To disable verication at the time of
writing, select HDD → SETUP from the
thumbnail menu and set the option
VERIFY to OFF. This speeds up writing
without verifying data writing.
•
Select ALL SLOT to write data
collectively onto all P2 cards currently
inserted in the unit to the hard disk
drive.
•
For a Type-S hard disk drive, data can be
written on a card basis. The data on up
to 23 P2 cards can be stored on the hard
disk drive. The data set on each P2 card is
recognized as a separate drive by the PC.
•
If data on a P2 card that contains a
defective clip must be written to a hard
disk drive, then we recommend xing or
deleting that clip before writing the data.
•
When the process is diskontinued during
verication, the data on the P2 card has
been written to the hard disk drive.