


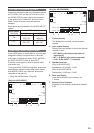

54
Adjusting the recording level
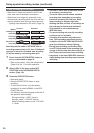
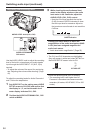
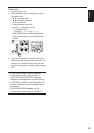
AUDIO LEVEL knob (CH1, CH2)
AUDIO AUTO/MANU CH1,
CH2 switch
UsetheAUDIOLEVELknobtoadjusttherecording
levelofthebuilt-inmicrophoneorofaudiosignals
inputthroughtheAUDIOINPUT1/2(XLR,3pin)
terminal.
•
Toadjustthevolumeofthesoundformonitoring,
see“Adjustingthevolumewhileshooting”(Page
40).
ToadjusttherecordinglevelsforAudioChannels1
and2,followthestepsbelow.
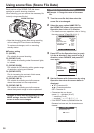
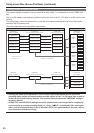
1 Set AUDIO OUT on the setting menu AUDIO
SETUP screen to CH1/CH2 and conrm that
the display is 1, 2, so that the audio level
meter display indicates CH1, CH2.
2 Position the AUDIO AUTO/MANU CH1, CH2
switch at MANU.
Switching audio input (continued)
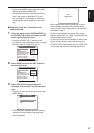
3 While checking the audio channel level
meter in the display window or the audio
level meter in the viewnder, adjust the
AUDIO LEVEL (CH1, CH2) control.
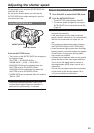
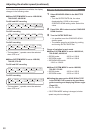
•
Notethatifthelevelexceedsthetopbar
(0dB),thewordOVERilluminatestoshow
thattheinputlevelisexcessive.Adjustso
thatmaximumsoundlevelsdonotreachthe
0dBbar.
C
H
1
C
H
2
OVER indication
Pressing the USER button to which the
magnication of the audio level meters (MAG
A.LVL) has been assigned magnies the
audio level meters.
•
“Audiolevelmetermagnication”(Page55)
•
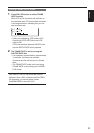
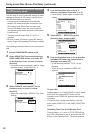
TheCH1andCH2charactersarehighlighted
(theywillappearinwhitetext)whenINTMICon
theAUDIOSETUPscreenissettoON.
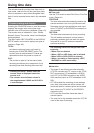
INT MIC ON INT MIC OFF
Checktherecordinglevelpriortoshooting.
•
Therecordinglevelissethigherthanfor
Panasonic’sbroadcast-usecamera-recorder
recorders(AJseries,AG-HPX500,370or300
series).